Car lifts enable you to work on your garage projects efficiently. It relieves you from the chaos that comes with using jacks and jack stands, kneeling, and shoving yourself under a car for service. Initially, there has been a perception that car lifts are expensive, impractical to fit in most garages, hazardous to work with, and that the installation process is strenuous. These perceptions steer us to the question, how to put a car lift in my garage?
A car lift is installed by assembling the metal frames and installing the functional hardware, which involves positioning and correctly installing cables inside the columns, drilling accurate holes in the columns, and tightening the bolts. Next is installing the power unit, cable lines, and hoses, and finally completing the set up by putting up the lift arms and raising it to work.
Car lifts are available, affordable and due to innovation, manufacturers have come up with varieties of car lifts to suit any garage. I am about to explain how to stop dangerous stunts of squeezing and crawling under a car, so you begin working on your feet.
Before the installation process, there are certain elements to put into consideration. Also, there are varieties of car lifts to choose from, but since we aren’t aware of which kind of cars will be rolling in, we need to go for an all-around kind of lift and one that many people would opt to settle for when purchasing.
Once your package arrives, unload it carefully, and since this is a heavy load shipped in large wooden crates, you need to ensure a forklift is available to unload it. Do not forget a moving dolly that will help you move your crate inside the garage.
You need to maintain safety at all times and throughout as you will be handling a machine that can pose a danger. Carefully read and follow instructions, the installation process is not very difficult, but you need to be keen on details. Get someone to assist in lifting the heavy objects, so you don’t stress your back.
Ensure your floor concrete is deep and robust enough to support all the lift columns. Most manufacturers will suggest concrete between 6-12 inches in depth and have a minimum of 3000 pounds per square inch.
As you follow the step-by-step instructions, ensure you note the manual that accompanies the lift to have exact details of the instructions given since most lifts differ depending on the model and manufacturers.
Items required to put a car lift in your garage
- Two 10′ to 12′ step ladders
- ISO 32 Light Hydraulic Oil (approx. 12 quarts)-+
- A tape Measure
- Rotary Hammer Drill with ¾ in Drill Bit (Core Drill Rebar Cutter recommended)
- 4′ Level
- Sockets and Open Wrench set, ½ in. thru 1-1/2 in. (1-1/8 in. for ¾ in. Anchors)
- Vise grips
- 8mm Socket Head Wrench
- Torque wrench
- Teflon Tape
Step-by-Step Process to Install a Car Lift in a Garage
Positioning and installation of cables
Begin by positioning and installing the chains and cables inside the columns. Be very keen to follow instructions because specifications do differ depending on the model and manufacturer. Make sure the cables are put correctly in place. There is a recommended distance between the place you are putting your lift and the garage door, which varies depending on the kind of lift you have chosen but well-elaborated in the instruction manual.
Ideally, the lift should be positioned 13 feet away from the garage door to give an adequate space to drive the car inside the garage and ensure it doesn’t stick out of the door when it is raised. Once you have figured out where to install the two columns, sketch a line to illustrate where to install the two columns.
Please make sure you have somebody to assist in lifting the heavy objects; you can strain your back muscles and quit the job halfway. No, I don’t want an awful experience making something essential as this. Position those columns and ensure they are aligned with the chalk line.
Drilling
Are you sensitive to dust and noise? This process is very noisy and dusty, but I assume that you shouldn’t be sensitive since the repair shop is your workplace. However, you need some earplugs and a dust mask just in case. Now let’s get to business.
Drill the accurate depth and make sure this depends on the lifting capability of the lift. Remember to use the correct size drill-bit according to the concrete bit needed. 4” deep for 7-10k models, 6” deep for 12-15k models, 8” deep for 18k models.
The holes existing in the base plate should guide you. Carefully drill the holes of the central column, then proceed to the other side. Do not forget to drill the holes using a hammer drill. Repeat this procedure until the hole is emptied and then clean out the dust build-up in the holes; this increases the holding power. Cautiously place the bolts in the holes without tightening them just yet. Hammer the bolts until the washer rests against the breastplate.
Place the columns evenly with a level and ensuring there’s no side to side or front to front plumb. If any, then you need to fix it using horseshoe shims, making sure it balances uniformly. The recommended thickness should be 2-1/4”.
After making sure the columns are uninformed, you need to tighten them at 85lbs of Torque. When you are through with installing the power side column, begin working on the offside column to make it easier and effective. Then follow the exact instructions step by step to install the second column.
You have beautifully secured two columns already; let’s begin the installation of the Top Tough Assembly. This procedure is relatively simple. You need to have a forklift or two ladders and two strong men on each side to assist you in raising the bars.
Once the bar is on top, make sure the bolts are tightened. It would be best to smile a bit because you will have finished setting up the structure and the most challenging part of the lift. Next, cautiously inspect the anchor bolts. If they become loose as you were tightening the top bar, make sure you tighten them again.
Hydraulic power unit installation
The hydraulic power unit is a little heavy, and you will likely need some help. It comes with a vibration dampener, and it has to be placed in between the hydraulic unit and the column. When you have finished installing the hydraulic unit effectively, you need to fill it with hydraulic oil, roughly 4 gallons.
Cable lines and Hoses installation
Depending on the type of lift you purchased, the process of installing the safeties may differ. You need to install the safety cables, hydraulic lines, power unit hoses, and routing the equalizer cables. Despite the different installation processes of the safeties for different lifts, most of them will require you to install the safety cables through the cylinders inside the columns right through the top of the lift—the same procedure to be applied on installing the hydraulic lines and power unit hoses.
Be keen on the manufacture’s manual too. Step by step, those instructions will show you how to fix each cable and the exact positioning. There’s no heavier lifting when you are done with this process, but you will need to pay attention to what you are doing. A slight error might get you starting all over again. I bet you don’t want that.
The video below shows a process of installing a 2 post 10,000lb Vehicle lift in a garage with the most essential considerations
Lift arms installation
Finally, it would be best if you assembled the lift arms, easy peasy. You only need to position the lift arms correctly and slide in the headpins. When they are well-positioned inside through the holes in the arm assembly, install the snap ring into the groove inside the lift and the headpin on the underside of the lift head. Ensure the arm restraint gears are accurately positioned and regulated.
Each lift arm should be accurately positioned in its right and left during the presentation. Confirm if the gears are functioning effectively before operating the lift. Remember, you have to constantly inspect your gears time after time to confirm if they are in the right place. Any error here could pose a danger since this is the part that lifts the cars and hold them in position for several hours as you work.
Ensure the teeth on the gear ring interlock smoothly with the teeth on the gears of the arm restraint. Next, you must tighten the gear ring bolts. Move the lift arm from right to left, testing if it can handle your weight before loading a car on top. You have to keep adjusting the gear ring on the arms to make sure they are operating smoothly.
That was relatively easy if you follow instructions from the start to the end coupled with the manual that comes with your lift. After that, you should be able to install your lift, and it should take you just a couple of hours. The only thing you need to remember is to be very careful and maintain safety at all times.
Which lift suits your Garage?
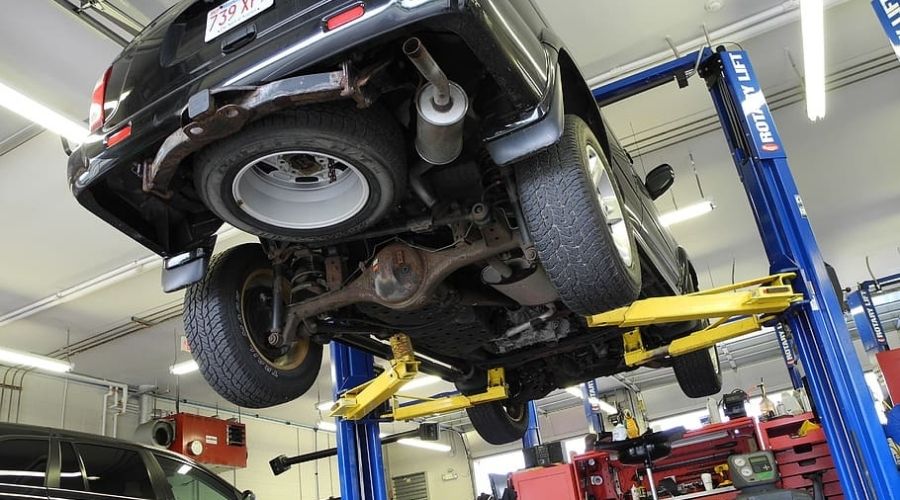
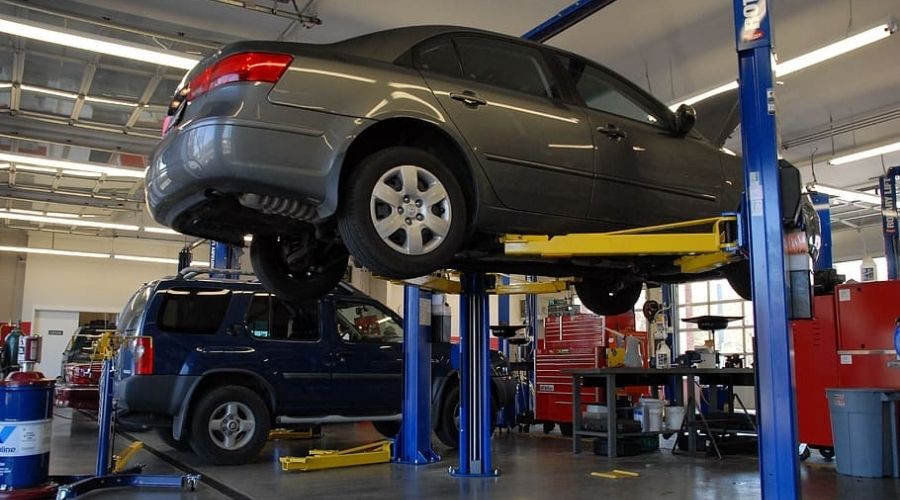
Apart from the two posts lift we have elaborated on, we have four posts lifts. A four-post lift has two extra columns making them four hence the name. They are usually used for long-term storage and parking due to their more excellent stability.
The four posts also get installed without them being rooted on the concrete floor. 2 post lifts suit someone who works on a car. Still, it doesn’t need to store it for more extended periods, while four-post lifts are suitable for parking and storing vehicles for more extended periods.
The four-post lifts, however, do not give easy access to work on the car from below. Moreover, the four-post lift is more stable, more robust, and easier to install, making them more expensive than the two-post lift.
Pros
Car lifts are vital because they provide an easier way of vehicle maintenance. It’s easy working on a car lifted above the ground than bending and squeezing right under one. Car lifts protect your car from theft and any breakage that would happen at the driveway. They also protect from fading due to exposure to sun and rain.
Cons
If not carefully installed can expose you to danger.
Every garage should at least have a car lift. The choice of lift to install in your garage will depend on why you are putting up one, like making garage work easier or storage purposes.
Frequently Asked Questions
How much does it cost to put a car lift in your garage?
The cost of putting up a car lift in your garage depends on the type of lift you intend to install. Professionally, installing a car lift in a garage will cost you between $500 to $10,000 depending on the type and size of a car lift you buy.
Where do you put a car lift in a garage?
Again, this is a question of what works for you best. In most garages, the car lifts are aligned with the entry doors or bay. Small or medium spaces characterize such garages. However, you can place the lift in a corner or at an angle for the large-spaced garages based on what suits you best.
How deep does the concrete need to be for a car lift?
Often, the depth of concrete for a car lift is determined by the manufacturers. However, the standard depth for 2-post and 4-post lifts requires at least a minimum of 4-inches of a reinforced concrete slab to be safely installed.
Which is better, 2-post or 4-post lift?
Perhaps the most sought-after answer among the garage owners who intend to set up a car garage. Based on the space, the four-post lift takes much more space than the two-post lift. Consequently, a tow-post lift will raise the car higher in a low ceiling garage.
For instance, in a garage with a 10-foot ceiling, the two-post lift will raise most vehicles to about 6 feet off the ground. However, the most significant advantage of the four-post lift makes it much easier to load and position the vehicle.
Conclusion
Working in a garage requires having tools and equipment to make the work easier and create a work-friendly environment. After going through this article, you will be able to correctly and cautiously install a car lift in your garage. Therefore, we can confidently say this article clarifies how to put a car lift in your garage.
Other Related Articles
http://newgaragesource.com/best-tacoma-lift-kit/
http://newgaragesource.com/portable-car-lifts-for-home-garage/