Keeping things organized can be challenging if you store your yard tools and equipment in your garage or use it as a DIY workspace.
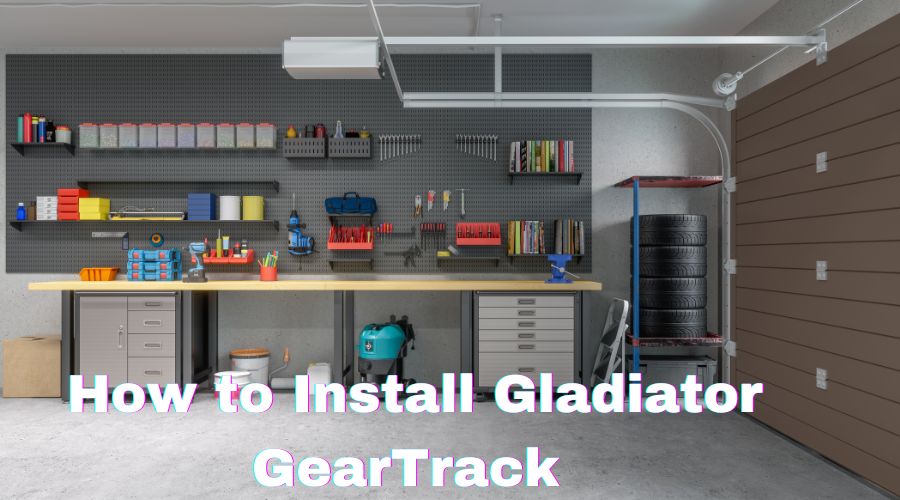
An excellent way to organize the garage space and de-clutter it to leave you with more wiggle room is to utilize the garage walls for storage. This requires a garage wall organizer such as Gladiator GearTrack or Gearwall.
Each of these is straightforward to install and comes with clear installation instructions to walk you through the project.
This article shows you how to install Gladiator GearTrack in simple steps. The guide also provides a list of the tools and supplies to use.
Also Read:
What are Gladiator GearTrack panels?
GearTrack boards are wall organizers or storage systems that provide a way to hang things on the garage wall. They have a unique double-channel design that keeps racks, hooks, and other wall storage accessories locked in place to allow you to hang things there.
Gladiator is the maker of America’s most popular garage storage systems, so you should be delighted to know that GearTrack is compatible with all the accessories from this manufacturer. These include baskets, hooks, and more.
GearTrack is an excellent way to utilize the garage wall for storage and free up much-needed floor space.
GearTrack channels come in rails measuring 6 inches high and 4 feet long. Each of these rails can hold a maximum of 75 lbs. per linear foot.
This great storage capacity means you can hang heavy items on Gladiator GearTrack channels. Their closest competition, Gearwall, can carry only a maximum of 50 lbs. per linear foot.
So GearTrack is ideal for storing heavier stuff like a ladder or bicycle.
They are also an excellent way to mount garage storage cabinets. You will be able to move your cabinets along the system to match your preferences.
We particularly love how the GearTrack channels hide behind these wall-mounted cabinets, creating a super clean installation with the units appearing to be mounted directly to the wall.
How to install Gladiator GearTrack
If your garage feels too crowded for your car to fit in, it is time to free up some floor space with a wall storage system.
Or perhaps you spend minutes clawing through stuff in your garage just to find a tool you need for your yard work. These are all telling signs that your garage needs Gladiator GearTrack.
These are popular and easy to find at local and online stores, including Amazon, Home Depot, and Lowe’s.
Notice that you can install these rails on drywall with wood framing or on concrete. This guide will cover installing Gladiator GearTrack over wood framing and masonry.
Installing Gladiator GearTrack over wood framing
Here are the things you will need to install this vital wall storage system.
- Stud finder
- Measuring tape
- Screw bit
- Power drill
- Level
- Drill bit
- Screws
- Pencil and eraser
Procedure for installing Gladiator GearTrack on drywall
After assembling the tools and materials needed to complete this process, follow these steps to install your garage wall storage system.
Step 1. Decide where to install the Gladiator GearTrack
Your garage will likely have several walls with enough space to accommodate the storage system. But you may only want to install the rails on specific sections set aside for storage purposes.
Once you have decided where to install the channels, measure the area to confirm that the track pieces will fit the space. If they are longer than the allocated space, use any suitable electric cutting tool to reduce them to the appropriate length.
In any case, most garages should work with the rails in their full length, so cutting them before installation should be optional.
Step 2. Locate the studs on your wall
When installing the track system on drywall, ensure every screw goes into a wall stud. Mounting the track directly to the studs allows you to use them for support.
If you mount the rails on drywall anchors, you will not get the necessary support for all the stuff you’ll put on the wall system.
To locate the solid wood behind the drywall, use a stud finder. Your stud finder will likely have lights indicating where the wood begins and ends. Since the device shows the edge of each stud, you will need to mark both edges to identify the stud’s solid center.
Alternatively, you can use an additional backup stud finder that works by magnetism. This sticks to the wall wherever drywall screws are. This should be an accurate way to locate the wall studs.
A backup magnetic stud finder will be handy in cases where the wall has extra plywood behind the drywall for fire protection. Your stud finger may read that additional density, making it hard to identify the wood you need.
To use a stud finder, sweep it slowly across the wall in the horizontal plane where you wish to install the storage panel.
- Observe the LED lights on the finder to help you identify the edges of the wall studs and mark them.
- Repeat the sweeping motion from the opposite direction and mark the edge.
- After marking the edges, place a small X or vertical line between them to indicate the center of the stud.
Step 3. Prep the layout for your GearTrack channels
Once you have decided where to install your GearTrack rail, line it on the wall and use a level to get its position perfectly horizontal.
Use a pencil to mark off the position. You could then use a long level to extend the pencil line to cover the entire length of the GearTrack panel.
Ensure you mark all the studs clearly above the horizontal line. Positioning these marks above the horizontal line ensures you can see them when installing the GearTrack panel.
Alternatively, you could use painter’s tape instead of a pencil if you are concerned about having marks on your wall.
While preparing your layout, ensure you locate all electrical wires in the wall. The power cables may be running vertically to the outlets on the drywall or along the same horizontal plane as these outlets.
Ensure you steer clear of these wires when drilling or driving screws through the drywall.
The other critical thing while planning your layout is ensuring the track edges fall on a stud for appropriate support. Having a long unsecured section of the GearTrack would mean it will flop around.
Step 4. Predrill your GearTrack panel
We recommend pre-sinking some screws into the GearTrack to simplify the installation work. This strategy is especially beneficial if you are working alone.
- Put a scrap piece of wood on a work surface and place the track on top
- Predrill a hole within a quarter of an inch from the track’s edge on the upper and lower channel.
- Sink screws into each hole, ensuring they only get slightly past the track’s surface.
- Next, you can predrill the remaining holes where you will drive screws into the rest of the wall studs.
Step 5. Put up the panel on the wall and make it level
After pre-sinking a few screws into the GearTrack, it is time to put it on the wall. Line it up on the mark you made, ensuring it aligns with the wall studs on a perfectly horizontal plane.
Since you already have the screws ready, you should have no problem hanging the board.
Drive the first screw into the wall. The idea is to drive it in just enough to hold the panel in place while you set it to be perfectly level.
If unsure whether you’re getting the alignment correctly, use your hand level to check it out and ensure the orientation is perfect.
Step 6. Secure your GearTrack to the wall
After setting the orientation correctly, use one hand to support the board while you complete drilling the holes using the other.
We recommend marking off the screw length on your drill bit with painter’s tape. This will help ensure you don’t go too deep.
In the unlikely event that you get the positioning of the electrical wiring in the wall incorrectly, this precaution might help prevent you from drilling into one. Still, you may want to turn off any nearby sockets for extra safety.
It is best to screw the track into as many wood columns as possible for maximum support.
With your GearTrack at full length, ensure you attach it to at least two studs. Otherwise, you may need to switch to a different location in the garage.
If you intend to hang more weight on the rail, getting it as secure as possible is crucial. And the more attachment points you can get, the more things you can comfortably hang on the panel.
If you hit something hard when drilling, stop immediately; it could be a nail plate.
After drilling all the holes, come back and sink all the screws to secure your GearTrack panel on the wall.
Step 7. Fit the end caps
End caps are optional. If you like to include them, add them after driving in all the screws to create a more finished look.
These are easy to add as they are designed to snap onto each track’s end. This should mark the final part of your work just before adding the hooks to accessorize your GearTrack channel.
Installing Gladiator GearTrack over masonry
If your garage wall is bare concrete, it should not prevent you from installing Gladiator GearTrack channels and using them to free up some floor space.
Concrete garage walls have no wall studs, so you can expect the installation to be less secure than one installed over drywall.
Procedure for installing Gladiator GearTrack over masonry
Unlike drywall installation, concrete installation is a two-phase process. Concrete can allow water to seep into the area around the screw securing your board to the wall. This can cause corrosion and weakening of the screws.
So you will need to install vertical wooden studs before the Gladiator GearTrack. The panel will then go directly onto the studs rather than the concrete wall.
Step 1. Install your wooden studs
Since these are recommended to be vertical to offer maximum support, it’s upon you to decide how long you want them to be. Nonetheless, boards measuring approximately 2- by 4 feet should cut it.
A minimum of 3 feet should be ideal for the length of your vertical studs. This height should be adequate to support the full weight of your track system once loaded with everything you want to hang on it.
The manufacturer recommends waterproofing your garage wall before installing the studs. Now is the time to do it, for good measure.
When attaching the wood board to the concrete, ensure you screw into masonry blocks and not the lines between them.
And a hammer drill with Topcon concrete anchors placed about 14 inches apart should do the job.
Consider having enough studs to create six attachment points per channel.
Step 2. Mount your GearTrack onto the studs
Once your wooden studs are on the concrete wall, drill six holes into each GearTrack channel. This creates a total of 12 screws per board.
Remember that the more attachment points the board has, the better supported it will be.
Ensure that each screw is at the bottom of the channel and not the center of the channel.
- After sinking the screw holes, use a level to check the orientation of the board before screwing it.
- Drive the screws into the board, attaching it to the vertical wooden studs.
- Add end caps if you want a clean finish.
The video below shows a step-by-step process on how to install a GearTrack, especially if you are a beginner
Conclusion
Creating a more organized garage space can be challenging if you keep everything everywhere. However, the right system can turn things around and make it a walk in the park to get more organized in your garage.
We hope you enjoyed learning how to install Gladiator GearTrack channels in your garage. If you have any thoughts or additions to this tutorial, feel free to leave them in the comments.