 Skip to content
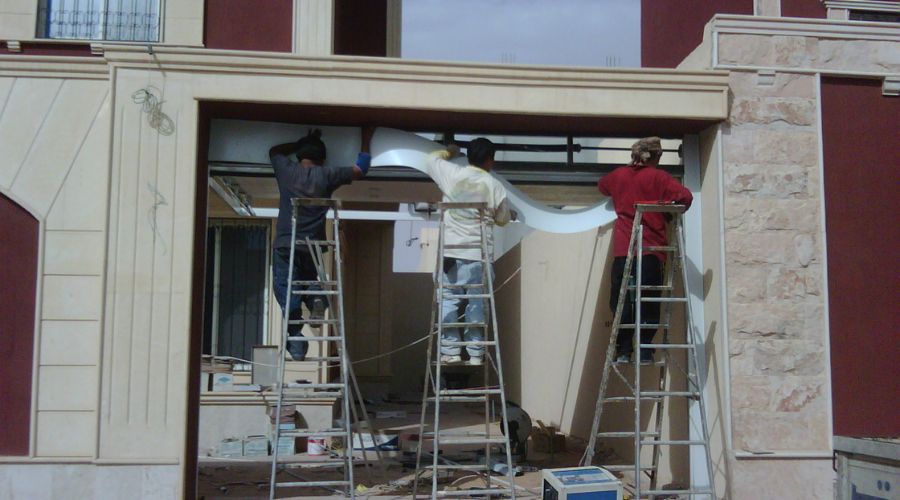
Automating your garage door is an ideal way to achieve convenience and efficiency in your garage door operation mechanism. Perhaps, an ideal way to accomplish this is by installing a quality garage door opener. The cost of an opener, not to mention that of installation, can be a significant drawback.
However, before you throw in the towel, you can try minimizing the costs by installing the opener yourself.
Tag along as we equip you with the tips on how to install a garage door opener to make your installation process a success.
Also Read:
- Best Wall Mount Garage Door Opener
- How to Reprogram Chamberlain Garage Door Opener
- How to change garage door keypad code
- Best Garage Door Opener
In this article, we’ll discuss;
- How to Install a Garage door Opener
- How to mount garage door opener to ceilings
- How to install garage door opener motor
- How to Install a Belt-drive garage door opener
Let’s dive right in;
How to install a garage door opener
Although tedious, successfully installing a garage door opener brings satisfaction to any homeowner. In addition to saving some coins, you get to know your new opener better, making it easier to fix by yourself in case of a hitch.
More importantly, safety comes first when dealing with the garage. This entails wearing protective gear, such as a helmet and closed shoes. Also, ensure that your clothes are intact in that they don’t entangle on the garage door parts and end up causing injury.
Garage openers usually come with most of the accessories you will need for installation, making it easier to assemble the equipment. Be sure to crosscheck if the parts on the list match with the ones that accompany your garage opener.
Here are some additional pieces of equipment you should keep close to facilitate the process:
- Drill
- Screwdriver
- Lag screws
- Mallet
- Wrench
- 8-foot ladder
- Pieces of angle iron
- Stud finder
- Tape measure
Once these are in place, you can install your opener through the steps below.
How to Install a Garage Door Opener
Step 1: Prep the garage door
The first step to a successful installation is ensuring you have a functional garage door beforehand. Prepping entails cleaning the garage door with water and soap rather than simply hosing it. By so doing, you will eliminate any debris that would otherwise hinder the closure of the garage door.
Follow up by deactivating any locks and operating the door manually to ensure the springs are intact. You can then lubricate the garage door, preferably using all-purpose grease such as Silicone-based grease lubricants. If the door closes uncontrollably or gives you a hard time while closing or opening, seek garage repair services before installing the opener rather than attempting to fix the opener yourself for safety reasons.
Step 2: Attach the rails
Among the accessories that come along with the opener are the rails. The process of assembling the rails varies depending on the model. Most of the latest models have rails with a tapered end on one side and a broad end on the other.
Attach the rails by inserting the tapered edge of each rail into the broader end while consulting your manual.
Step 3: Insert the carriage and the header bracket
Once the rails are intact, place one section on top of the garage opener, then slide the trolley along the other section of the rails. Follow up by securing the trolley using a fastener to prevent it from sliding off the rails.
Subsequently, insert the U-bracket into the other end of the rails and secure it firmly either by hand or using a mallet. You can then use a fastener to secure the bracket onto the opener to ensure the carriage tube is steady enough.
Finish off by enclosing the U-bracket using a bracket cover before proceeding to the other end of the cartridge tube.
Step 4: Install the belt/chain and the pulley
For this step, you will want to identify the groove on the other end of the carriage tube, away from the opener. Once you do so, pass the belt or chain through this groove, then install the pulley.
Ensure you consult your manual because how and where you insert the belt or chain varies depending on the model. Upon inserting the belt or chain as per the manual, install the pulley accordingly and fasten it with a screw. More importantly, while securing the pulley, ensure it’s not too tight to enhance mobility.
Step 5: Install the opener on the ceiling
At this point, you should have your garage opener attached to one end of the carriage tube so you can attach the other end to the header bracket. Identify the header bracket among your opener’s accessories and fasten it at the center above the garage door.
You will then need a ladder to help support the opener as you prepare to install it on the ceiling. Consider opening the garage door to provide additional support to the rails. Once ready to perform the installation, locate the joists onto which you will mount the opener.
In some cases, you may find it challenging to pinpoint the joists, especially if they lie underneath drywall, but a stud finder could bail you out. What follows is to mount your angle iron depending on the location of the joists. You can mount the pieces of angle iron according to your preference, as long as you attach them onto the studs rather than drywall to secure your opener firmly onto the ceiling.
Step 6: Connect the opener’s carriage tube to the garage door
Your garage opener should include at least two brackets for this purpose. Otherwise, you will need an additional door bracket.
First, fasten one bracket onto the trolley on the rails and screw the carriage arm to this bracket. Follow up by securing the other bracket onto the top of the garage door and attaching the elbow-shaped portion of the carriage arm using screws. You can then connect the carriage arm to the elbow-shaped part per your user manual to link the opener to the garage door.
Step 7: Install the garage opener’s accessories
You will have completed the most challenging part by this time, and the remaining bit should be a breeze. The garage door opener’s accessories, in this case, include the emergency release cord, LED light bulbs, safety sensors, and wall console. Each of these plays an essential role in enhancing safety in the garage, meaning you should be cautious while installing them.
Start by installing the emergency cord into the carriage on the rails while ensuring it isn’t too high for accessibility. It is better to install the lightbulbs per the user manual because each model has different specifications. Installing lightbulbs is of utmost importance because they come in handy while programming most openers.
For the safety sensors, measure at least six inches above the ground and install them at the rear end of the track. Ensure that the sensors are directly opposite each other to avoid interrupting their line of sight, then wire the sensors according to the manual’s instructions.
Finish off by wiring and installing the wall console fairly above the ground to ensure it is out of reach of children.
Step 8: Test the garage opener
After all the hustle, it’s finally time to put your garage opener to the test. Try operating the garage door, as usual, to check whether the travel limits are okay.
Also, check if the safety sensors are working effectively by placing an obstruction at the doorway to test whether the door will retract. You can also note how smoothly the garage door opens or closes and make adjustments where necessary.
More importantly, keep in mind that the process of installing garage openers can vary slightly depending on the model, but this is a general breakdown of the procedure. Ensure you refer to your user manual for any additional steps or tests you need to perform amidst installation.
The video below shows how to install a garage door opener
How to mount garage door opener to ceiling
You can use different designs to mount your opener to the ceiling. The location of the joists on your ceiling often determines the design that is suitable for you. Before you commence, assemble your garage opener using your manual as a guide, then ensure these tools are within your reach:
- A tape measure
- Wall bracket
- ¼ by two or ¼ by 1-inch lag screws
- Eight-foot ladder
- 36-inch galvanized angle iron
- Hacksaw
Once they are in position, you can get started through the steps below:
- Identify the center of the garage door by measuring using your tape measure and mark it. Mark the ceiling and the floor according to the center of the garage door so you can identify the exact point to mount your garage opener.
- Pick up your opener’s wall bracket and screw it at the center, above the garage door. The end of the carriage tube away from the motor attaches to this bracket.
- Support the opener with a ladder once you attach the other end of the rails to the wall bracket.
- Locate the joists on the ceiling, section your angle iron accordingly, and then screw the first piece onto the ceiling.
- Screw more pieces of angle iron onto the one on the ceiling using the lag screws. You will then screw them onto your opener, depending on your chosen design. You can install the pieces of angle iron perpendicularly or in a V-shaped fashion. Also, you may consult the manual for more designs that suit your opener.
- Ensure the opener is firm by tightening the lag screws and cutting the angle iron pieces at appropriate lengths.
More importantly, mount the opener high enough (at least seven-feet high) to allow adequate space for garage users.
How to install a garage door opener motor
The motor serves as the core of your garage door and is located inside the drive unit. It facilitates the trolley movement along the rails, lifting and lowering the carriage arm, causing the garage door to open and close efficiently.
You may want to install the motor to automate your garage door or replace an old opener. Either way, the trick is to choose a quality motor unit that suits your needs. Among the indispensable factors to consider are the amount of headroom and the availability of power in the garage.
With a suitable motor and a few tips on how to install it, you’ll be unstoppable.
The first step is to assemble the motor and carriage tube. This entails putting the rails together and screwing them to your motor unit while following the directions in the manual. Once the carriage, rails, and drive unit are in line with the center of the garage door, you can begin mounting the motor with the help of a ladder.
Also, ensure that the upper part of the motor unit and the garage door are at the same level to ease the installation process. You could support the track by opening the garage door as well. This will enable the motor to angle downwards, making it easier to pull the track easily. The practice also minimizes friction, leaving you with a smoothly operational garage door devoid of nuisance sounds and a long-lasting motor.
Another point to note is that the motor is bulky, meaning you should provide a sturdy support system. Instead of simply attaching the motor to the ceiling, it is advisable to utilize the rafters, which offer a firmer foundation.
You may use a magnetic stud finder to locate the rafters or joists on the ceiling, then cut your perforated angle iron pieces accordingly. Consider attaching two short pieces perpendicularly to the motor unit and screw a slightly longer piece horizontally to the ceiling joists using lag screws. Finish up by joining the angle iron pieces accordingly using bolts.
Also, note that there is no specific way to position your angle iron pieces while installing the motor. You can freely explore various designs, provided the motor is high and sturdy enough for utmost convenience. Some manuals offer different designs for you to choose from, which come in handy.
How to install a Belt Drive garage door opener
Choosing to install a belt drive garage door opener is an ideal way to upgrade your old garage opener, thanks to its convenience. A belt drive garage door opener graces you with quiet operation and minimal maintenance because you don’t have to lubricate it, unlike chain drive openers constantly.
Despite their differences, the process of installing belt and chain drive garage door openers is almost similar. The only difference is that you will feed a belt into the track in place of a chain. The procedure, however, varies depending on the specific model. That said, follow the steps below while occasionally referring to your manual to perform the installation:
- Confirm whether the garage door is balanced by checking whether it opens and closes effectively, then make the necessary adjustments before installation.
- Assemble the garage opener components as per your manual. You can start by attaching the rails accordingly, then screw the track onto the drive unit through the U-bracket.
- Insert the carriage on the other edge of the rails and a screwdriver afterward to prevent it from falling off them.
- Follow up by inserting the belt through the hole at the rails’ edge, away from the drive unit. Identify the ribbed edge of the belt and ensure it faces inwards before proceeding.
- Subsequently, insert the idler pulley just after the belt as your manual directs and fasten it to the rails using a bolt.
- Press the ribbed edge of the belt onto the pulley and attach one end of the belt to the carriage. Tag the other end of the belt along with you while ensuring it doesn’t intertwine as you move toward the motor unit, then attach the belt to the sprocket just as you did with the pulley.
- Keep moving with the belt toward the other side of the track to form a loop. When you get to the other edge of the belt that you attached to the trolley, consider consulting your manual on how to attach the hanging edge of the belt to the trolley using the equipment that came with your opener for best results.
- Once the belt is intact, finish up assembling the opener and get ready to mount it to the ceiling accordingly.
The takeaway is that you should insert the belt so the ribbed part will attach to the pulley. Also, it is advisable to grease the pulley before screwing it to the rails. More importantly.
Do not fasten it too tightly so it can rotate freely when the belt moves.
Frequently Asked Questions-FAQs
How much does it take to install a garage door opener?
It is hard to say the exact amount it will cost you to install your garage door opener. This is because many factors come into play, including your model or brand of choice and the type of opener you choose.
The cost of openers varies due to different features. For instance, a belt drive opener will cost you more than a chain drive. It will also depend on whether or not you’ll need additional accessories, such as an extension kit for garage doors that exceed seven feet.
A quality opener could cost about 280 dollars minus the installation cost. Installation by a professional could cost up to $200, without mentioning the cost of additional equipment. Therefore, you’ll do yourself a favor by performing the installation yourself.
What happens when you pull the red cord on garage door?
The red cord attached to the garage opener’s carriage is the emergency release cord. As the name implies, the cord comes in handy during emergencies by enabling you to operate the door manually. Pulling the cord deactivates the carriage’s spring mechanism, allowing you to operate the garage door manually in case of a blackout or when the door malfunctions. True to its name, the cord comes in handy during emergencies.
Can I replace a garage door opener unit without changing the rails?
No, the garage opener comes as a full package, meaning you can’t replace it and leave out some parts. One thing to appreciate regarding garage openers is the constant technological evolution. Even models within the same brand change over time, meaning the parts are most likely incompatible, and the rails aren’t an exception.
Attempting to change your garage opener while ignoring the rails to save on costs could cost you more in the long run. Therefore, whenever you decide to replace your opener, you have to go all the way and replace all the components for ultimate results.
Can I install a garage door opener myself?
Yes, if anything, installing the garage door opener by yourself could enable you to cut back on costs significantly. If you’re doing it for the first time, be patient and perform the installation one step at a time while consulting the manual to avoid making mistakes.
About six hours could be enough for frequent DIYers to complete the installation. More importantly, dress appropriately for the job and wear protective gear to reinforce your safety.
Conclusion
With a perceptive user manual, patience, and the right tools, almost anyone can install a garage door opener effectively. Let’s face it, the garage opener itself is costly without including the labor cost. Even worse is that when you include the cost of additional equipment for installation, you could spend barely less than eight hundred dollars for the entire process.
Why break the bank when you can install the opener by yourself? Consider utilizing the tips mentioned above in addition to your opener’s user manual to save yourself some coins. For safety reasons, you can leave the wiring and spring adjustments to an expert.

Undeniably consider that which you stated. Your favourite reason appeared to
be at the internet the simplest factor to take note of.
I say to you, I definitely get irked whilst other folks consider worries that they plainly do not recognise about.
You controlled to hit the nail upon the highest
as well as defined out the entire thing without having side-effects , folks
could take a signal. Will probably be again to get more. Thank
you