 Skip to content
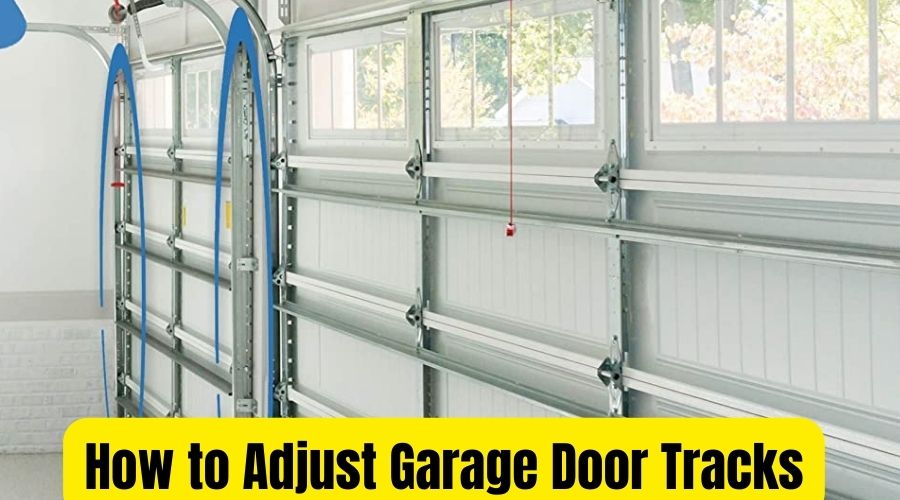
If you are a garage owner, there are certain essential elements that you must be accustomed to and understand their operations. For instance, your garage door has numerous components that are key to its operations. A slight malfunction in these components can significantly affect your garage’s daily routine, and the consequences could be dire if you have no know-how on how to fix it.
The door tracks are one of those crucial elements that you must understand their operational mechanism to determine when there is a hitch in their functionality.
The garage door tracks facilitate the movement of the door by allowing the rolling of the wheels, hence controlling its opening and closing. The tracks are made of steel and come in different sizes and thicknesses. As a result, they help keep your door stable and withstand external forces, including harsh weather conditions.
However, the garage door tracks may need adjustments over time due to continued use, causing misalignment, or the door may begin to stick, hindering its free opening and closing. If you do not have the skills or needed knowledge to adjust the doors to position, you would be forced to dig deep into your pocket and hire a professional.
However, this adjustment process is pretty simple and you can do it by yourself in five simple steps. Read on and learn How to Adjust Garage Door Tracks without consulting an expert.
Also Read:
What are Garage Door Tracks?
Garage door tracks refer to the stationary lanes that facilitate the garage door’s movement. The tracks control the opening and closing of the garage door. The door will not close or open if the tracks are misaligned or out of position. Thus, your garage door’s functionality depends on the orientation of the garage door tracks.
The garage door tracks resemble an upside-down L-shaped structure on either side of your door. The tracks run from the floor to the ceiling of the garage. However, the tracks run along the bottom and top of the garage door assembly for individuals having sliding garage doors. In that arrangement, the tracks allow the garage door to slide back and forth, facilitating the opening and closing of the door.
Thus, if you own a garage, you would not downplay the importance of garage door tracks in your garage operation. Always check for any bend or misalignment on the tracks when your garage door cannot close or open efficiently
How to Adjust Garage Door Tracks
To adjust the garage door tracks, you must loosen their brackets, move them, inspect the garage door track adjustment, and then tighten the track bolts. However, before pulling the track bolts, you must first adjust the door gap before attempting to open or close the door again.
Let’s dive into a detailed look at adjusting the garage door tracks.
Tools you will Need
- Wrench or Screwdriver
- Rubber Mallet
- Woodblock
Step 1: Loosen the Track Bolts
Locate the screw or bolts that hold the track to the door frame on either side and using a wrench or screwdriver, loosen it by rotating the driver counterclockwise. Ensure you have identified all the screws and repeat the same procedure for all.
Note that you are only loosening the screws without removing them. Also, you must not lose these screws because it will force you to purchase new ones to fasten the tracks after adjustment.
Step 2: Move the tracks
Determine whether your garage door has horizontal or vertical tracks. You will move the track to the left or right if it is vertical. The same will apply to horizontal tracks. Between your door and the track, there is always a small space. In most garage door systems, this distance is always less than a centimeter, which is uniform for both tracks.
You can enhance the ease of moving the track by putting a wood block in front of the way or align them by a rubber mallet to guarantee they are perfectly vertical. If the garage door is too close to the track, it will get stuck. As such, ensure a convenient distance between the track and the door to facilitate movement during the adjustment process.
Step 3: Check the Positioning of Tracks
The positioning of the door tracks is of significant importance. You can ensure the correct positioning of the tracks using a spirit level. One thing you do not want to miss at this point is ensuring that regardless of the type of track you have (whether vertical or horizontal), they should be perfectly aligned. The door’s operating mechanism will be hampered if you miss the alignment.
Step 4: Tighten the Bolts
If the alignment is already in place, use the wrench or a screwdriver to tighten the track bracket bolts. This will ensure that the bolts or screws hold the tracks in the right positions after adjustments to allow the door’s movement. While doing so, ensure you have not over-tighten the bolts.
Step 5: Test the door’s opening and closing Mechanism
Once you have tightened the bolts back to position, test the garage door’s operation. You can move a distance and try operating the garage door with the opener to determine whether it operates normally. Keeping the distance is a safety feature if the door does not work efficiently or is rightfully tightened. You can be in a severe injury crisis if the door malfunction or misses its track while testing it.
How do you adjust the side gap on a garage door?
When your garage door is rubbing or has a gap, you must first determine the bolts’ positions on either side of the track and loosen them. Move the track on both sides of your garage opening to establish a 1/4-inch gap between the molding and the door and finally tighten the track bolts back to position.
All the above practices will guarantee perfect alignment of your garage door and facilitate easy closing and opening without creating a pap or rubbing. However, if you are unsure of executing this process, you may consider contacting a garage door expert to help with the adjustments. The process is, however, straightforward to execute by yourself.
Common Garage Door Alignment Problems and How to Fix Them
Solving common garage door alignment problems requires you to equip yourself with certain tools. You can easily get these tools in any workshop near you or if you already have them in your garage. The tools you might need include;
- A level
- Rubber mallet
- Wrench or screwdriver
- Compressed Air
- Clean Cloth
The various issues associated with garage door alignment include
Binding
If your garage door is binding, you must adjust the position of your door’s track. First, locate the screws that attach the track to the wall and loosen them using a screwdriver or a wrench. Once loosened, gently tap the bottom of the track with a rubber mallet to position it in the right spot.
Straighten the tracks up and down using a level before you finally tighten back the screws. Ensure that you have done the same to the other side of the door.
Off-Balance
Off-balance can result due to wear and tear, breaks, or if the tracks are warped. The first approach is to inspect the garage door’s cables and springs to see if they show unusual signs, such as breaks or warps. Since the garage springs hold much weight and tension, we do not recommend that you try fixing the issue yourself, as it can potentially expose you to injuries. Instead, call a garage professional to help you with the repairs.
Rubbing
If the garage door tracks are rubbing, the problem could be the existence of a gap. The remedy is to close the gap.
To close the gaps, start by loosening the screws using a wrench or screwdriver to lower the track brackets. Move the tracks while keeping a gap of 0.25 inches between the molding and the door. This gap should be uniform. You then need to tighten back the track into the right spot.
The video below shows how to adjust the tracks on a garage door.
Frequently Asked Questions
Q1. Why is one side of my garage door higher than the other?
When one side of your garage door is higher than the other, it is probably due to the uneven distribution of the door’s weight. This unequal weight distribution interferes with the alignment and causes an unbalanced garage door.
Conclusion
Like any other moving part of a system, the garage door has a life. Over time, the door may become misaligned. For instance, if you back up into a car, that may result in a shift off-center and influence its operation. Also, continuous usage, especially when operating a commercial garage, may result in wear and tear of the garage door parts.
If you realize that your garage door is no longer operating smoothly or functioning normally, you must first check the garage door tracks. Determine whether they are correctly aligned and make the adjustments as elaborated above.
You can check for various signs, such as when the garage door appears crooked or off-balance, binding that causes difficulties in closing or opening, or when your garage door starts to rub against the rubber molding. These signs will help you establish when to align the garage tracks.
We hope this helps. Let’s engage in the comment section below. Regards.
