As a homeowner, you tend to add worthwhile projects to your garage. You could be working with power tools alongside heavy facilities. That means your electrical circuit is overburdened with extra responsibility. In this concept, that’s when a sub-panel comes into play.
Bedding in a sub-panel is vital since it safeguards your primary energy source from overloading and converts your detached garage into a self-reliable energy segment. Many individuals are unfamiliar with installing these products and would seek information on “How to install sub panel in a detached garage.
Let’s find out how.
How to install Sub Panel in a Detached Garage
A sub-panel is installed in a garage by attaching it to the main panel to ensure needed service is done to the main panel through the sub-panel when a need arises. This only involves small but necessary services that do not need the interference of the operation of the main panel.
The sub-panel is also handy in a garage when you want to disconnect the power supply without reaching the main panel. That means you won’t encounter the hassle of going back to the main basement if you purport to turn off the power in the garage.
Installing a sub panel in a detached garage is possible, but there are numerous aspects to weigh before setting up. Once installed, the good thing is that it turns out to be convenient to access electricity primarily at the time of need. It is paramount to watch out for the voltage of the sub panel you want, which is dependent on the amount of energy you utilize when harmonizing your obligations in the garage. For instance, if you are operating with compressors and welders that run on a high voltage, then a 100-amp sub panel will do the trick. But if you are articulating smaller jobs, 50 to 60 amp will work best.
All garage devotees can attest that a sub panel is an effective method to attempt when you need to distribute multiple branch circuits to your garage. But what is the role of the sub-panel in a garage?
A sub panel is fitted to a detached garage for two vital motives: efficiency and convenience. As to why you should install these gadgets in your detached garage, they minimize construction cost and save ample time by lessening the effort required to return to the main panel to access electricity.
Requirements for Setting up a Sub-panel
There are few necessities that you should have at hand when installing a sub panel. One of them is two hot wires, popularly known as feeder wires. The feeder wires are linked to a 240-volt double pole breaker in the main source to deliver all the power towards the sub panel.
Power is then supplied downwards via two hot bus bars. You will need to have a single circuit breaker connected to the bus bars, which then distributes sufficient power to the branch circuits running out of the sub panel.
Another critical thing to include in the setup process is a ground rod. A detached garage needs to have its ground rod without regard to whether they are three or four wires that feed it. The purpose of the ground rod is to offer little resistance to an electrical avenue to the ground. The ground rod also aids in stabilizing voltages from the main panel and fritter away static discharge to earth.
Here is a list of the tools and materials needed when setting up a sub panel.
Tools
- Voltage tester
- Lineman’s pliers.
- Screwdriver
- Hammer
- Strippers
- Flashlight
Materials
- Sub panel.
- A set of mounting screws.
- A verified feeder cables.
- Breakers for the new circuit.
How to Install a Sub Panel in a Detached Garage
It is critical to know how a sub panel works even before you do the installation. That aids a lot, especially when you are required to settle upon the specs and other features of your sub panel.
Indeed, setting up a sub panel is a process that entails so many issues. In the first place, you are required to dig a channel roughly 18” deep to shelter the outdoor electrical wire that you will derive from the prime panel box towards the sub panel.
If you are dealing with a 100-amp sub panel, opt for 1.25 inch PVC conduit. But if the sub panel you are utilizing boasts less than 50 amps, use 1” PVC conduit. From that point, you can now direct the conduit towards the primary source. But that is if your garage has been sealed with concrete. If that’s not the case, then run the line into the ground inside the detached garage.
To pull the wire quickly, consider a 90-degree sweep connector in preference over 90-degree sharp connectors. After that, distribute white, black, green, and red wires from the breaker box to the main source. However, if the climate is cold outdoor, leave the wire to parade inside to catch warmth. The logic behind that is that it is much easier to work with a warm wire than cold.
After completing the whole setup, it is essential to try out the sub panel using a voltage meter to assert that it has the desired amperage. After replacing the panel box leads, switch on the garage breaker and enjoy the convenience in your garage.
The following gives a step-by-step process for the installation of the Sub Panel in a Detached Garage
Gather and Assemble the needed Materials
The first process for the installation is the collection and assembling of the necessary materials and tools. For instance, you will first need to purchase a sub-panel box which is the primary requirement. When purchasing the sub-panel box, ensure that you have in place the user manual to help you identify the various components of the sub-panel box as the omission of one component will result in inconveniences.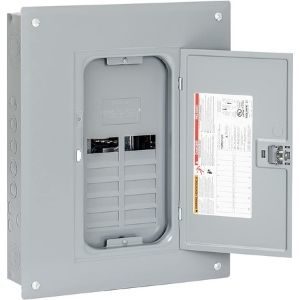
Secondly, you will also need screws that are integral in attaching the sub-panel. Ensure that you check the screws in the sub-panel box. If they are not adequate, consider buying additional screws. Besides, you will need pipes that will be used to connect to the panel. The pipes will be cut to the required sizes depending on the places of installation and the distances. You will thus require to buy glue since the cut pipes will be glued.
Locate an Appropriate Place
The determination of the right place for setting the sub-panel forms the second step in the installation process. For instance, when you intend to install the panel in a garage, ensure you secure a place outside the garage since often the main panel is located inside the garage.
The main panel controls the power supply in the whole garage and runs the electrical connection. Thus, when you want to set a sub-panel for the same purpose, it should be in another convenient place, not in the same locality as the main panel. The place should otherwise suit you to allow you to do the job remotely without having to go to the main panel.
Disconnect the Power Supply from the Main Panel
Since you are working with electricity, one of the safety measures while installing the sub-panel is to cut the supply of electricity from the main supply until the connection between the main panel and sub-panel is completed. Ensure that you close the connection line before the power works.
Install the Sub-Panel
The fourth step involves the installation of the sub-panel. The first step in the case is to take a pipe and connect the main panel to the sub-panel box. The pipe contains the connected wires of the main panel to the sub-panel. The pipes should be attached to the panel to secure the cables.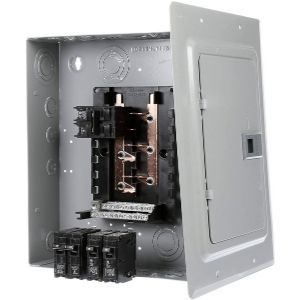
The next step in the installation process is to measure to scale where the panel is getting installed. You need to mark this area and make a hole in the spot using a drilling machine. The drilling is essential to ensure that the panel is mounted on the wall. The sub-panel is then stuck on the wall using the nails, and cardboard of the same size as the whole is used to ensure it is firmly fixed. The cardboard can also be used to hold the nails in place. You then add the pipe to the hole. The pipe is then glued. The same is done on the other side of the main panel.
The pipes are then connected. The sub-panel is then fastened using the screws and allowed t stick on the garage wall.
Turn on the main panel
Once you have set the whole configuration in place, check the connection and confirm the wires are correctly connected to the neutral, live, and earth wires. Once it’s done, you can now switch the main panel and ensure the sub-panel works perfectly through the on/off switch. With this, you have successfully installed a sub-panel in a detached garage.
The video below provides a step by step installation process of a sub panel in a detached garage
Safety measures when wiring
We all know that electricity does not forgive carelessness. That tells you that it’s imperative to follow the recommended safety guidelines when handling electricity. For instance, before you commence wiring, certify that the breaker is not turned on.
Again, you are not sanctioned to operate electrical circuits with bare hands. Arm your hands with rubber gloves before you begin the project. Most importantly, ensure that you set up a ground fault circuit interrupter since working in a detached garage involves dealing with outside wiring.
Extra tips
- When you are undertaking this project amid a cold season, keep the wires inside to catch warmth. Working with cold wires won’t promise you demanding outcomes.
- Note that the amperage of your sub panel determines the colored wire you employ. A classic example is that a 50 amp will need #THHN wire.
- Before launching the project, ensure your garage is supplied with a flashlight. That will help you to exercise your work easily.
Frequently asked questions
Is it possible to safely attach a sub panel in a detached garage to the main source with a 3-wire connection?
Yes, it’s applicable. In case you are used to 4 wire feeder and find yourself in a scenario where a 3 wire feeder is, needed, you might consider joining the ground conductor to an accurate grounding electrode system. But the grounding electrode system must have more than one ground rod.
How much does it cost to install a sub panel in a detached garage?
Installing a sub panel in your detached garage can attract roughly 1200 to 4000 USD, which does not integrate the labor costs. A sub panel is characterized by amperage, which comes in 50 amp, 100 amp, 200 amp, and 400 amp. A higher amperage translates to a higher price. Now you are informed why this is a task that most users prefer to do by themselves.
Do I need a sub panel?
Yes, it is vital to have this unit installed in your garage because of the endless benefits you will get from it. The logic behind having a sub panel is to evade overburdening on the main source of energy which may bring about a burnt fuse, jumped breaker, and others.
Final Thoughts
The precise time for home advancement is during summertime, and the best place to make a start is in your detached garage. After digesting this article, I believe you are now convinced to install a sub panel. This article, therefore, answers the question of how to install a sub panel in a detached garage. It is straightforward to install this product in your garage if you carefully follow the steps provided in this article.