Garage doors are not only used as entrances to pack your vehicles and do repairs but also offer immense security to your garage tools and equipment.
However, the doors are subject to breakage over time, and because they are heavy, they can cause massive injuries to you, your family, or even your pets when they malfunction. Having them integrated with features that can help you determine when they are not in good condition is integral. This is where the safety sensors come in.
Garage doors have sensors that act as a safety feature for residential automatic garage doors. They have a blinking light that keeps you and your family safe by alerting you to any issue with the opener. In addition, the sensor can reverse the direction of a closing door if they detect an object in the door’s path. As a result, your crawling children, pets, or valuable objects cannot be crushed by the door when it closes.
With constant daily use, it’s customary the garage door may need repair. Some factors that cause malfunction are; bad rollers, corroded pulleys, and faulty sensors. All these malfunctions may result in your garage door sensor blinking red.
Let’s dive in and learn.
Also Read:
- Garage Door Sensor Yellow Light and Green Light
- Genie Garage Door Sensor Blinking Red 3 times
- Best Garage Door Opener
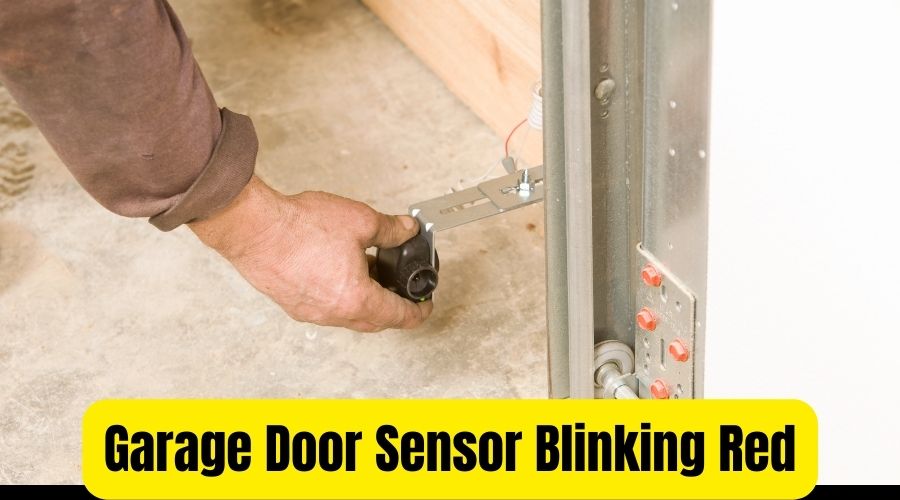
Why is my Garage Door Sensor Blinking Red
The red lights mean your garage door sensors are out of alignment or obstructed. Correct the malfunction by tightening the screws and inspecting the brackets to align the sensors until you see a steady green light. A steady green light means the sensors are powered and correctly aligned (See each other).
Also, you can use a soft dry cloth to carefully clean the sensor as the red lights may result from dirty lenses. You may also want to check the door’s path to see if there is any obstruction. Attempt closing the door after that and confirm if it closes perfectly.
Note: The LED on your garage door plays an essential role in informing you of the status of the sensors. The indicators show different colors while in operation or when they malfunction. For instance, the exterior LED indicator will blink red when you try to close the door if the sensors are out of alignment, damaged, obstructed by an object, or covered by dirt.
Often, a steady green light indicates that the sensors are working correctly and powered on, while the red blinking light indicates an issue with the sensors and requires the attention of the garage owner.
Garage Door Sensor Blinking Red – Causes and Troubleshooting tips
 Misaligned Sensors
To check if the garage door sensor is out of alignment, check the exterior LED light blinks when attempting to close the door. A steady green light indicates the receiver sensor is working. If the sensor is flashing red, it could mean the sensors are not aligned. Misaligned sensors are the primary culprits to a garage door opener blinking red.
With the red lights, try inspecting the bracket or tightening a screw on the blinking sensor. You can measure the distance from the ground for both sensors and determine if they are correctly aligned. Often, the two sensors are 6 inches above the ground each. Use a tape measure and align the sensors to the same height. If the light stops blinking and the garage door closes properly, then the problem is fixed.
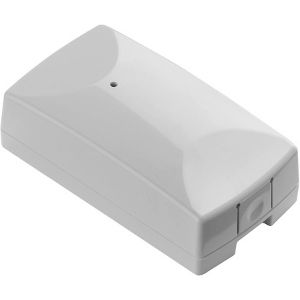
Below is Z-wave Plus Gold Plated Reliability Garage Door Tilt Sensor, White (TILT-ZWAVE2.5-ECO, an example of garage door sensor. You can buy this model at amazon.com.
Dirty Lenses
The presence of spider webs or dirt on sensor lenses can hamper their operation, influencing the opening and closing of garage doors. As a result, you may see the garage door sensor’s red light blinking.
However, you can solve the problem in the most straightforward process possible. You only need a clean, soft cloth to wipe the sensors carefully, and they will operate normally again. If you are living in a dusty environment, you may need to perform regular cleaning to keep your sensor lenses free of dust.
Damaged Wires
Wiring connections like disconnected wires, shortened wires, and improper ones can cause the safety reverse mechanism and garage door red light blinking. The cables connecting the garage door sensors system can wear and tear due to pests’ infestation, regular usage, or weather.
Check to see if the wires have indications of tempering like water damage, chew marks. If so, there is a need for wire replacement.
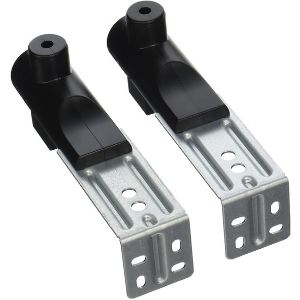
Another exemplary garage sensor unit is Genie GSTB-R STB-BL Replacement Safety Beams, Black, 2 Pack, Black, one size (GSTB-R). You can also purchase this model at amazon.com.
Damaged Sensors
Like any electric equipment, your garage door sensors are subject to wear and tear over time. As a result, when your garage door malfunctions or when your garage door sensor flashing red, check for damaged wires or sensors, primarily when you have used them for over five years. Most sensors have a lifespan of between 3-5 years.
In that case, replace the damaged sensors.
Moisture
Your garage door sensors may be affected by the water sprinklers or rain and you may notice the overhead garage door sensor blinking red. Check for any moisture on your garage door sensors and ensure the sensors are always dry and free of dust particles.
What color should the lights be on the garage door sensors
Garage doors have two sensors sitting 6 inches above the ground on either side of the door. Both sensors illuminate steady light while in operation but with different colors.
One sensor always produces a green light showing the sensors are powered. A steady green light indicates no obstruction on the door’s path and sees or receives rays from the transmitter sensor. The sensor that emits green light is the receiver sensor.
The second sensor, also called the transmitter sensor produces a solid red light. A steady red light indicates that the sensor sends a ray to the receiver sensor and that the two sensors see each other. If the red light is flashing, the sensors are obstructed, unable to communicate, or out of alignment.
You can use a tape measure to determine whether the sensors are correctly aligned or check for dirt or dust on the sensors’ eyes and clean them with a soft dry cloth to correct the problems.
How to Reset Garage Door Opener
(Reset by Unplugging Garage door)
You must shut off or unplug the breaker connecting your garage door. The aim is to shut off the power in the door system entirely. Wait for at least 10 seconds before you turn the power back on.
Next, locate the “down” arrow in your remote and press it until the door closes completely. You need to set this position as “closed” by pressing the “set” key on the remote.
Similarly, locate the “up” arrow and press. Watch the door move and carefully stop when it is approximately 6 inches from the opener. Again, press the “set” button. This resets your garage door opener.
Alternatively;
(reset by using the Opener Unit)
You can also reset the garage door opener using the installed opener unit.
Step 1: Locate the lean button
The first step is to determine the position of the “Lean or Home” button inside your garage opener unit. The “Lean” button is always next to the unit’s antenna. The button is significant in resetting the opener.
Step 2: Remove remote controls and keypads
Once you have located the “lean” button, press and hold it for 5-10 seconds or until the LED lights in the opener turn off. The opener will reset automatically. You then need to remove all the keypads and remote controls connected to the opener or operating the unit.
Step 3: Examine if the opener has reset
Check if the LED light inside the opener unit flashes. The flashing LED indicates that you have successfully reset the opener. You can now open your garage door using the remote control or keypad.
How Garage Door Sensors Work
Residential automatic garage doors have a safety sensor feature designed to protect your family or pets from injury or death due to entrapment. Every garage door should have a sensor that acts as a critical safety feature to tell when something is on the way before the door closes. When the safety sensor detects something unusual such as an object or a motion underneath, it automatically reverses the door closing direction.
The garage door openers, especially the smart garages, are operated by activating a motorized pulley system through remote control. These garage doors use infrared signals to activate the electric motor once a button in the remote is pressed. The activation of the electric motor results in the engagement of a track-and-pulley system that controls the opening or closing of the garage door. The advantage of motorizing your garage is enhanced flexibility. You can conveniently open your garage door while still in your car.
Other garage doors are operated through buttons wired to the house. You, however, must reach the garage door to operate them. The good news is that with the massive advancements in technology, the modern garage door openers now combine these two technologies, remote control, and buttons. This adds to the convenience of operating the garage doors as if one fails, the other works, saving you the time you would have otherwise used for repairs.
The infra-red sensors are placed at either side of the garage door and are always placed 6-inches off the ground. However, if any sensor malfunctions, one of the sensor lights will begin to blink red. Besides, when the opener cannot notice that the safety sensors are not working correctly, the opener light flashes and the door refuses to close. A faulty sensor causes inconveniences and is a safety hazard.
The video below shows how you can fix a garage door opener that is blinking.
My Garage Door Won’t Close ( 4 Simple ways to Fix)
Check the Sensors
An issue with your garage door sensors can inhibit your garage door from closing all the way.
Every garage door has a safety sensor mounted by the tracks near the floor. The sensors offer security to your children, pets, or any other object on the garage door’s path and prevent the door from crashing them.
However, when faulty, these sensors can send wrong signals. You need to check the lenses on the sensors to ensure that they are free of dirt or dust. You should regularly wipe or clean the lenses with a soft cloth to remove the dirt and facilitate its efficient operation.
Also, check the color produced by the indicator when it blinks. If it produces green light, it is functional. However, check for the misalignment, sensor wires, and whether the lenses are covered with dirt when it blinks red.
Check your Remote
You always use your remote to control the opening and closing of your garage door. However, your garage door can sometimes fail to close with the remote. The problem lies with the battery, which can be dead and need replacement.
In addition, the power surge can also be another culprit that can wipe clean your garage door’s memory. The first step is to check on the batteries and replace them. If this does not work, you will need to reprogram your remote.
To program your remote, determine the position of the lean button in your garage opener. Use a ladder to reach your mounted garage door opener and remove the light cover. You will see a large “learn” button. Press and hold the button.
At the same time, locate and press the lean button on your remote. Press the two buttons at the same time until the light flashes. The remote shall have been programmed.
Check the Trolley
Your garage door is connected to the opener through a trolley mechanism. The trolley mechanism features a rope that engages or disengages the door from the chain driven by the garage door opener.
If you push the garage and realize it moves freely by hand, then there is a possibility that your trolley may be in the bypass mode. Pull the rope towards the door to take the trolley latch out of the bypass mode. The trolley will latch nack and effectively work once activated the garage door opener.
Check the rollers and tracks
Any obstruction to the tracks can inhibit the functioning of your garage door even when the sensors are functional. In addition, damaged rollers may also influence the functioning of the garage door.
If you have determined your sensors are functional, inspect both the rollers and tracks to establish whether there is any form of damage. If there is any bend on the tracks, take it back to the appropriate position using clamps.
Also, ensure that your garage door rollers are effectively lubricated to minimize friction between surfaces that can hinder the opening or closing of the garage door. You can use silicone-based grease as a lubricant.
How to Test a Garage Door Sensor
Determining the functionality of your garage door sensor is an imperative undertaking. The process of testing the functionality of the garage door sensors is pretty straightforward. It only takes a few minutes and can be performed by anyone to guarantee the overall safety of the garage door.
The testing process involves the assembling of any object like a box or brick. You then place the object directly on the ground in the path of the door. Activate the garage door opener to close the door with the object on its path. The door should automatically reverse after sensing an obstruction in its way, indicating that the door is functioning correctly. If the door closes on the object, the implication is that the door sensor is faulty. You will need to troubleshoot and determine the potential cause of the problem.
Common Garage Door Problems
The garage door won’t open or close
A broken garage door fails to open or close properly. Maybe the door can respond to control prompts irregularly, inconsistency in movement or failure to operate. The door should take at least a second to react once homeowners click on the activation button. If that’s not the case, then it may be due to the following problems.
Irregular garage door-When the garage door responds inconsistently to activation switches or buttons, it’s probably due to a faulty connection with the electoral circuit that synchronizes with the remote control prompts.
Awkward garage door-A door that moves awkwardly may have faulty wiring or coming off its tracks. Homeowners should repair a malfunctioning door immediately as it can lead to other problems.
Broken garage door- A broken garage open wires can render the circuit dead, causing the garage door not to open or close.
The garage door shakes when opening or closing.
The garage door should move smoothly and steadily. A shaky garage door shows there is a problem with the tracking, rollers, lubrication or belt.
Tracks –The garage door moves on surrounding tracks, the rollers on each end slide up and down as the door is in motion. The door shakes when the trails are broken or corrupted. Homeowners should replace the damaged or rusty tracks.
Belt-The garage door is moved up and down by a belt, activated by control prompts to pull the door up and release it down as desired. When the belt loses tension or gets weak, then with each movement, the door might shake.
Rollers- As the belts pull the door up and release it back down, rollers keep the side of the entry aligned to the tracks. The rollers can erode, rust and crack after a period causing the door to shake.
Lubrication-Inadequate lubrication can cause the door to shake when all other components are in good shape. The door needs to be replenished regularly for smooth movement in the bearings within the roller and the pulleys. When lubrication goes stale, the door has trouble moving; certain parts could erode and crack due to excess friction.
Noisy door operation
Quietness is the characteristic of a smooth, fully functional garage door. A noisy garage door is a signal that something is wrong within the mechanisms. A noisy door can be caused by;
A bad Spring- Springs are the nerves of the non-moving parts. When they are strained or pinched, they can cause noise when the garage door is in operation.
Worn opener bracket-The brackets should be solid and optimal to perform their role in opening the garage door. It should be free of shakes or creaking noises.
Worn rollers and lubrication-The quietness of the garage door can be compromised when the bearing becomes dulled or loose in rollers or pulleys. Worse sound can be of both. Homeowners should apply Lithium-based grease on the path yearly.
Sagging garage door sections
The condition occurs when the garage door drops by a couple of inches. It is often a mistake that many homeowners overlook. The sagging door indicates a more significant problem that can cause harm to children, pets and vehicles. A sagging can mean many issues such as;
Worn tension spring- A strained spring may lack the elasticity it once had thus may not carry out the function of holding the door at the correct height.
Dulled Rollers-The edges of the rollers can dull over time as the door goes up and down daily. It mainly occurs in rubber rollers hence should be replaced after a few years. Dulled rollers can lose their fitting within the tracks and sag under the weight.
Dulled tracks-At a certain period, the track may not function properly. On a particularly long trail, the edges may bend slightly outwards and lose their ability to hold the door’s weight in place. Repeated friction can also cause dulled rollers to wear at the inner tracks.
Slow response time
Garage doors shouldn’t take longer than a second to respond to a command. If it takes a long before response, then there is something wrong with your entry. The mechanical or electrical problem causes hesitation on the garage doors; other issues are,
Broken garage opener cords –Strained cords responsible for lifting and releasing may prevent the garage door from operating smoothly.
Corroded pulley-When the bearing is rusted, loses, or cannot turn the pulleys, the door will hesitate when going either up or down.
Bad rollers- Rollers that are inadequate in shape can cause a hindrance when the door is in operation.
Chipped or broken areas of garage door
Garage doors are not exposed to direct rain, snow or falling objects but may serve as a playground for children or become targets for teeth and claws of canines. Consequently, pets and children can damage the following places.
The panel- Throwing the ball at the door can peck the wood and chip paint. The slow and constant damage may cause the door to malfunction.
Bottom rubber lining- The rubber lining serves as a buffer for the bottom panel. The constant banging of the door on the concrete when it closes can take a toll on the rubber, making it loose in certain places. Pets can also gnaw the rubber.
The edges-The wood on the edges may wear through constant movement along the tracks of the door.
Broken garage door cords and wires
Cords and powered wires support the operation of the door. The support becomes weak when the cables are damaged. These problems can be caused by;
Broken garage opener cords- Cords support the weight of the garage door. When the cables wear out, the door can sag. When the wires snap, the door can crash down on people, pets or vehicles.
Broken garage opener wires- Electrical wires power the mechanism that makes it possible for the door to move automatically. When the wire ceases to function, the electrical circuit dies, homeowners should replace the remote system.
What does it mean when one garage door sensor is green, and one is red?
A solid green light means that the sensor is powered on and receives the rays from the transmitter sensor, while a solid red light indicates that the transmitting eye is working correctly and sending the beam. A solid green light and a solid red light in either sensor show that the sensors are perfectly functioning, aligned, and can see each other.
However, if the red light is off or blinks, there is a problem with the sensors’ alignment or an obstruction in your garage door’s path, causing the two sensors not to see each other or communicate. Garage door sensors are safety elements designed to prevent the door from closing if there is a barrier in its path, such as a person or an object. This might include anything from a vehicle to another piece of furniture.
The sensors communicate by sending out a beam of infrared light between themselves. If this beam is broken, the door will not shut. However, if the sensors are not properly aligned, the beam might not be interrupted even if there is an obstruction, which presents a potential risk to the public’s safety.
If one sensor shows a green light and the other shows a red light, this may indicate that just one of the sensors is properly aligned and detecting the beam, while the other sensor is not. The green light on the sensor means that the sensor is powered on, the beam is clear, and the door can be closed without risk. However, the red light on the sensor indicates that the beam is blocked and the door should not be closed.
You could try realigning the sensors so that they directly face each other and the beam doesn’t break. The sensors are placed 6 inches from the ground on either side of the garage door to ensure they are aligned and can see and communicate with each other by sending infrared rays or beams.
You can also check if any obstructions, such as dirt or debris, could prevent the beam from functioning properly. Dirty lenses can result in the garage door sensors blinking red. Use a soft clean cloth to gently wipe the sensor eyes to remove potential dust or dirt that prevent the two sensors from seeing each other.
Frequently asked questions-FAQs
Q1. Why does my garage door stop when closing?
The garage door stops when the close-limit switch is wrongly set and prevents it from closing. Garage doors have set-limit switches that control or instruct the motor when to stop or open. When incorrectly set, the limit switch can make the door stop or cause the opener to pull back when you try closing it.
Q2. Why does my garage door not fully open?
When garage doors do not open fully it is due to electrical problems with the motor. When you don’t hear the engine operating when you open the door from the wall switch or remote, the motor or the power could cause the problem.
Q3. Can you bypass garage door sensors?
Yes. It is possible to bypass a garage door sensor since the photo eye sensors are positioned two-inch height, making it possible for you to step high above the infrared light to bypass the system.
Bypassing a garage door sensor will not prevent your garage door from closing. You can bypass the sensors by disconnecting the garage door opener.
Q4. Do garage doors have a reset button?
Yes. You can locate the reset button on the garage door’s motor, labeled as the “Learn or Home” button. In most models, the button is next to the LED and on the same side as the antenna.
Conclusion
The average garage door opens about 1500 times a year that causes a lot of wear and tear. This can cause damage to the door. The garage doors not opening or closing, the door moving unevenly, or the door opening at a slow pace. Homeowners can rectify these issues by troubleshooting. In extreme situations, homeowners should call a licensed expert to fix the damage.