 Skip to content
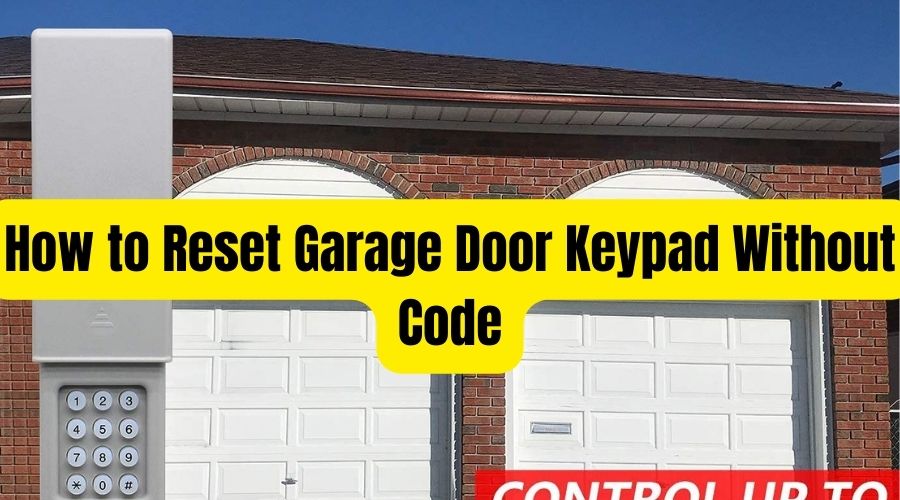
With the automation of different home factions, forgetting and confusing between the different passcodes in your home systems is inevitable. In addition, you may be moving to a new home with no idea of the old code, but you must access your garage, especially if it is the main entrance to your home. In both instances, you will be required to set a new code without the old code.
The garage door keypads today are integrated with advanced and innovative features that make their operations seamless. However, if you are interacting with the keypad for the first time or have lost your manual, you may fret and rush into looking for a professional or expert on garage door repairs. All this will come at a cost.
Not to worry! In this article, we have provided a detailed stepwise process on how to reset garage door keypad without code. We have also integrated the approach you can take if your garage door remote malfunctions.
Also Read:
How to Reset Garage Door Keypad Without Code
If you have forgotten your passcode, you can effortlessly program the keypad without entering the old code by pressing and releasing the Learn button, directly inputting the new passcode on your keypad within 30 seconds of releasing learn button, and press 0 three times to complete the reset process.
Step 1: Locate Learn Button on the Motor Unit
Set up a ladder to help you reach the motor unit and locate the Learn button. The Learn button/Knob is on the side of the antennae on the side of the motor unit, often orange or yellow in most garage door models.
Step 2: Press and Release Learn Button
Press and release the learn button when the LED on its side starts flashing. Pressing the Learn button is crucial as it erases your keypad’s old passcode. The opener will start blinking, indicating it is ready to accept the new code.
Step 3: Enter a New Code
Reach the keypad within 30 minutes of releasing the Learn button and enter the new password. Press 0 three times and observe the opener’s light stop blinking, showing that the new code has been accepted.
Step 4: Test the garage door keypad
Enter the new keypad code after 10 seconds and observe the garage door closing.
Note: You must set a unique passcode that would be difficult for strangers or unauthorized persons to guess.
The below video describes how to reset your garage keypad code without code or clearing the keypad memory. Watch and reinforce with the text as you reset your garage door keypad when you cannot recall the passcode.
How to Reset Clicker Garage Door Keypad?
The main challenge with resetting the Clicker garage keypad is determining your garage door opener type. Often, there is type 1 to 9. If you have determined your opener type, the process is pretty straightforward. Otherwise, you must attempt the 9 digits until you figure out your opener type. You can also check through the manual.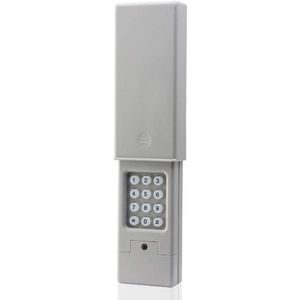
Nevertheless, below is a simple stepwise process to resetting a clicker garage door keypad.
Buy on Amazon
Step 1: Slide up the clicker keypad cover to access the keys.
Step 2: Press and hold the * and # buttons until the blinking or flashing of the keypad stops. The blinking takes about 5 seconds and then stops, indicating that the keypad has been reset.
Step 3: Enter a new but unique 4-digit code, followed by the pound button.
Step 4: Enter the type of garage door opener. This is always any number between 1 to 9. If you have determined your garage door opener type, you will key in the number followed by the pound (#) button.
Step 5: Set up your ladder to reach the LEARN button on your opener, generally on the side of the motor unit. Press and release the LEARN button when the LED beside it starts blinking.
Step 6: Before the blinking stops, rush to your keypad and click the new passcode you had set, followed by 0 three times. Ensure you have reached the keypad and entered the passcode within 30 seconds of releasing the LEARN button.
Once you have clicked the 0 three times after entering the passcode, the garage door will close. You can again try the passcode to see if the garage door opens. If you followed the process correctly, this should do the trick. The same process can be used to program the Chamberlain Clicker garage door keypad.
How to set a Temporary PIN code on Liftmaster Keypad
If you are hosting guests in your home or have traveled with your family on vacation for a short period, a homeowner should give access to the garage, especially if it is attached and a way into the home. This means the visitors must have the passcode on the Liftmaster keypad.
As a result, you would want to share with them a temporary PIN that will last for hours or for the duration they will be in your home, or you can create it depending on the number of times the visitors can access the restricted areas. This may sound difficult, but it is more straightforward than you imagine.
Let’s find out!
A. Setting a Temporary PIN based on Hours of Usage
Step 1: Key in your 4-digit PIN code on the keypad and press and hold the * button until the opener light blinks 3 times and release it.
Step 2: Enter the new 4-digit temporary PIN you wish to share with visitors when the blinking stops. Press the ENTER button and release it. The motor unit or the opener flashes four times. This indicates that the new PIN has been accepted.
Step 3: Use the keypad to enter the hours you want the new PIN to operate.
Step 4: Press the pound button to satisfy or confirm the changes.
The code will expire after the set time.
B. Setting Temporary PIN Based on Usage
Step 1: First, enter the passcode you always use for your garage door opener. Once the passcode is entered, press and hold the * key until you see the opener lights blink three times.
Step 2: Enter the new 4-digit temporary pin you intend to share with visitors. Press the ENTER button and observe the opener blinks 4 times, indicating the new PIN has been accepted.
Step 3: On your keypad, enter a value representing how many times you want the temporary pin used. If, for example, you choose 9, the PIN will only be successful 9 times, after which the garage door will not operate with the PIN.
Step 4: Press the pound (#) button to confirm the changes. You can now share the temporary PIN with your visitors. You can include an extra access time to test whether the PIN works.
How to Erase Garage Door Opener Codes
Your garage door opener codes are vital, and you must safeguard them at all costs to ensure they do not fall into the wrong hands. If you have noticed unusual attempts to enter your garage, you may want to erase the old codes and set new ones to protect and secure your garage items and home. As such, you will look into how to erase garage door opener codes.
If this is your first time trying to erase the garage door opener codes, ensure you can locate the LEARN button on the opener.
You can set a step ladder to reach the LEARN button, always on the side of the motor unit of your garage door opener. Press and hold the button until the LED light on its side goes out. This should be approximately 5-6 seconds. This will erase all the previous codes.
You can then re-program the opener again with either the keypad or remote. The various processes are illustrated above.
NOTE: The process of erasing the garage door opener codes can also be found on the backside of your motor unit in writing. On the left of your LEARN button, you will find instructions on how to erase the old codes from the opener. However, this could also depend on the model you are using.
How to Reset Garage Door Remote
Not all garage door openers are operated with a keypad. Instead, there are units operated using remotes that may also need resetting due to disrupted signals, dead batteries, or as a result of an engaged button. These elements may result in malfunctioning your garage door remote, and in the absence of the garage door keypad, it would be time to reset the Remote with your opener.
The reset process involves the following;
Step 1: Locate Learn Button
Determine the position of the Learn button on your garage door opener, often on the side of the motor unit and orange in color. Ensure you have set up a ladder to help you reach the motor unit, especially when you have mounted your opener on the ceiling or walls.
Press and hold the learn button until the LED on its side blinks, and then release it.
Step 2: Press the Program button on the Remote Control
Press and hold the ENTER button on your Remote within 30 seconds of releasing the learn button. Observe the overhead opener unit’s LED light blinks. The blinking indicates that the remote has been programmed with the opener.
If your garage door opener lacks LED lights, you will hear two clicks indicating a successful reset of your remote Control.
Note:
You may also want to ensure that the motor unit’s memory is free of the previous codes before resetting the opener with the remote.
The first step is to press and hold your opener’s LEARN button until its LED light goes off. You should hold the button for 5-10 seconds before the lights go out. Once the LED light on the side of the LEARN button is off, all the codes will be erased. Again, press and release the LEARN button when the LED blinks.
The next step is to press and hold the ENTER button on your hand-held remote control and observe the opener lights flash. Release the button. Again, if your opener has no installed light bulbs, you will hear two clicks from the opener, showing that the remote has been reset.
How Does Garage Door Remote Works
Garage door remotes use a radio signal set through different frequencies, normally from 350 to 390 Megahertz (MHz). The radio signal is encoded with a unique binary number for particular doors, ensuring the receiver (door opener) can only respond to that particular remote. The signal is transmitted when you press a button on your remote control.
A radio signal initiates the opening and closing of the garage door. The signal is sent from the remote to the opener’s receiver. The garage door openers have built-in radio receivers. The two devices (remote and opener receiver) communicate on specific frequencies that may range between 315 and 390 MHZ. The receiver in the motor housing picks this frequency from the remote. It is the radio signal that invokes the opening and closing of the garage door.
The radio signal from the remote to the receiver must be on the same frequency. If you buy a new remote or change your garage door opener, you must first program the remote with the opener. This will ensure that the coded signal sent from the remote to the receiver via radio frequency matches to raise or lower the garage door.
Furthermore, the signal from the remote to the receiver should be free from interruptions. When the radio signal from your remote is interrupted, your garage door will not open or close even if you repeatedly press your remote. Also, the remote may not work with the receiver if the batteries are dead or your receiver is not connected to a power source.
Therefore, if your garage door remote is not working, you can attempt some of the troubleshooting techniques we have elaborated below. But first, you must understand the causes of these problems and then the recommended solutions.
Garage Door Remote not Working
Dead Batteries
Garage door remotes use the CR2032 or CR2016 battery models as the primary power source. Some remotes, especially those operating the traditional commercial garage doors, use 12-v alkaline batteries or the 9v used in the modern garage door keypads.
However, these batteries have a lifespan, normally 12-18 months, depending on the usage and maintenance of the remote. That means, at some point, the batteries will be due for replacement.
If your garage remote is not sending the radio signal frequency to the door opener, a primary culprit is dead batteries.
You can easily diagnose to determine whether dead batteries are the problem. Try opening the garage door using the control panel. If it works, then the likely problem is depleted remote batteries.
The solution to this problem is simple. Replace the old batteries with the new ones. You must, however, ensure that the new batteries you purchase match the previous ones or are compatible with them. Once you have fixed the new batteries, test the remote with the garage door opener and establish whether the door works.
Signal Disruption
As mentioned, your garage door remote sends radio signals to the receiver. However, when this signal is disrupted, the receiver (garage door opener) does not instruct the door to open. That is, the garage door does not respond to a remote signal.
The signal interruptions can result from several causes. For instance, if you click the remote from a distance or there is a distraction between the remote and the garage door opener, it may fail to open. The remote is designed to operate within a given distance through which the signal can operate. Also, the signal disruption can be due to a broken antenna.
You can solve the signal disruption by operating your remote within 20 feet of the garage door. This is within the radio signal frequency coverage. The signal may not detect your remote if you move past the distance. Also, if you are within the distance and the door is still not opening with the remote, you can check for any obstruction on your path that might be blocking the signal.
The remotes are integrated with the antenna that should be pointing towards your door as you operate it. Inspect whether the antenna is broken or in good shape. If your antenna is broken, you may contact an expert to help you with the repairs, which might require some know-how.
Door Wiring Problem
A malfunction in your opener circuit could be another reason your garage door is not opening when you operate it with a remote. Often, opener circuits can be affected by a power surge that affects the motherboard.
If that happens, you must call a professional to help with the diagnosis, as this will require an individual with knowledge of electricity. A professional must inspect the opener to help establish the issue. The expert will disconnect the wires on the motor and control panel while assessing the wires on the opener receiver’s board.
After successful inspection, the expert will reconnect or replace the wires if damaged and clear the receiver’s memory. Once the wiring is completed and the memory cleared, reprogram your remote with the opener.
Test the remote once the programming is complete to establish whether the wiring was the source of the problem and that the remote is functioning.
Lock Button Engaged
Your garage door’s control panel is integrated with a lock button that prevents the door from responding to any controls when engaged. Sometimes, you can accidentally press the button without noticing.
Thus, when your garage door does not open with the remote, this is one area you would want to assess and see if the lock button is engaged and disengage it. You only need to press the button to disengage. You can then try closing the door with the remote.
Lost Signal by Remotes
As established earlier, the garage door remotes work by sending radio signal frequency to the opener receiver. However, your remote can disengage from the opener signal with time and continuous usage. The loss in the signal would prompt you to re-program the remote to reconnect it with the receiver.
The programming would take the same approach as illustrated above. Ensure you have correctly determined the LEARN button to help with the programming. Test the remote to establish if it works by controlling the garage door’s operation.
Wrap Up
The thought of forgetting your home or garage passcode when you do not know how to reset your keypad can be irritating and worrying. It can even be more frustrating if you have just moved into a new home and do not know about the existing code. That is why you must be equipped with the knowledge of how to reset garage door keypad without a code.
We have provided a simple 4-step process to reset your keypad when you cannot remember it or have just moved into a new home. Besides, if you intend to control your opener with a remote, this guide will help program your remote with the opener without worrying about the keypad.
In addition, ensure you have understood the mechanism of the operation of the garage door remote so that you can effectively troubleshoot it when it fails.
If you have questions or comments on the post, let’s interact in the comment section below.
