Garages are a vital extension of most homes’ main living spaces. Therefore, it is crucial to keep them looking their best.
Painting is one of the popular ways of protecting and improving the aesthetics of a garage floor. The project essentially involves the same procedure and requirements as painting any other floor or indoor surface in your home.
However, unlike when painting vertical surfaces, you must work your way toward an exit. You don’t want to paint yourself to a corner with no way to extricate yourself without spoiling the painted area.
If you have a garage floor that could use a makeover, read along to learn how to paint garage floor correctly.
Also Read:
Choosing the right paint for your garage floor
You may do an excellent job when painting your garage floor, but unless you use a good product, the results may not last.
The quality of your paint job ultimately boils down to the quality of the paint used. This underscores just how crucial a good quality product is.
-
Garage floor paint types
When choosing the paint for your garage floor, your options include latex, acrylic, and epoxy paints.
Latex paint is the least durable of the three. This water-based garage floor paint contains low concentrations of acrylic resin, making it less durable than the other paint types.
Acrylic paints have high concentrations of acrylic resin in their formula, making them more durable and longer-lasting than latex paints.
The third option, epoxy paint, is more durable than the other two due to the epoxy in its formula. The product consists of acrylic latex and epoxy resins, making it highly resistant to scratching, peeling, and chipping when dry.
The latter gets its premium qualities from the added epoxy. If you choose this option for your garage floor, you can expect it to last about four years, compared to acrylic latex paints, that last about one to two years, depending on the amount of acrylic resin in the formula.
Notice that aside from these paints, you could opt for standard epoxy, a two-part product consisting of an epoxy resin and polyamine hardener.
While these could have a service life spanning an entire decade, their application process is slightly different and may require professional application instead of DIY for the best results.
First, the two separate parts must be mixed in a specific ratio before applying it on the garage floor according to the manufacturer’s specifications. When used correctly, however, these water- or solvent-based products can create incredibly durable protective coats on your floor.
-
Deciding how much paint to buy
Every manufacturer usually indicates the coverage associated with their products. Paint coverage is indicated in terms of square footage, so as long as you know the size of your garage, it should be easy for you to determine how much paint you need.
If you are unsure about the exact size of your garage, use a tape measure to get its length and width. Then, calculate the square footage of the floor based on these figures and ask the seller to help you determine how much paint you will need to complete your project.
-
Consider the paint color
Most garages have lighter or brighter colors on the walls and much of their interiors. This color choice is not by accident.
Brighter or lighter colors reflect more light, making the space brighter and more livable. This effect will be priceless if you use the garage as a workshop as it will give you all the light you need.
The reflection of light also makes the garage appear more spacious. Whichever way you look at it, the benefits of this effect far outweigh its downsides, if any.
So, consider going for a light color from among the many options available on the market.
How to paint a garage floor
Once you have your selected paint, it is time to kick the project into gear. First, assemble the tools and materials you will need for the paint job.
The supplies you will need
You will need some or all of these supplies depending on your project and preferences. Here is an exhaustive list covering what you will likely require to complete the project.
- A can of your chosen paint
- Etching solution
- Patching compound for cracked or chipped concrete
- Compatible primer
- Applicator (paintbrush, roller)
- Color flakes (optional)
- Trowel (optional)
- Broom
- Detergent
- Degreaser
- Wet-dry vacuum
- Painter’s tape
- Brush
- Bucket
- Pressure washer (optional)
- Protective gear (Chemical-resistant gloves and dust mask)
The procedure for painting a garage floor
After assembling the tools and materials needed to complete this project, nothing should stand in your way.
Ensure you read the product label for specific application instructions and requirements, such as the ideal temperature for applying the paint and recommended recoat window.
Various flooring products require specific temperatures and humidity for their application. Observing these conditions will help ensure the proper bonding and durability of your paint job.
The product instructions may also include surface preparation requirements, which you need to obey.
Preliminary step. Ensure good ventilation in the garage.
Since you will be working indoors, ensure you open any windows and the garage door to create proper ventilation.
Adequate air circulation is essential when working with chemicals that may produce fumes, like the garage floor etching solution and solvent-based paints. Some cleaning solutions may also require proper ventilation.
Keeping the garage door and windows open will also greatly improve the lighting in your garage, which can facilitate a better experience.
Finally, wear the appropriate protective gear before you start handling any chemical products. Wear chemical-resistant hand gloves, a dust mask, and eye protection if you have any products likely to produce fumes.
While safety goggles and a respirator or dust mask may be optional depending on the products you have, a pair of gloves are required. You don’t want the paint messing up your hands and skin.
Step 1. Clean the garage floor
Your garage floor may have stains accumulated over time or fresh ones from automotive fluids and oils. Whatever the case, begin by removing these stains.
Most paints should be able to mask stains on the concrete, but you don’t want to take that risk. If you coat the floor with a light product, the stain might show through the finish. Removing them beforehand will ensure no blemishes spoil your paint job.
Begin by wiping away any oils, chemicals, or vehicle fluids on the floor. After that, use a broom to sweep away any dust and debris from your garage floor.
When you are done with the basic cleanup, spray or sprinkle a cleaner onto the concrete for deeper cleaning. You can skip this step if the concrete is new. However, you will have to allow newly installed concrete enough time to dry before painting, often at least 45 days.
But if you are painting an old concrete floor, apply a degreaser to remove any oils and grime soaked into the surface. Such buildup can interfere with adhesion.
Following the degreaser with an all-purpose cleaner should help remove the most stubborn stains on the floor surface. Be sure to follow the application instructions that come with each product, the degreaser and all-purpose cleaner.
Usually, you will need to sprinkle or spray the cleaner onto the floor and let it soak in for 10 to 20 minutes before scrubbing with a stiff-bristled brush and rinsing with a garden hose fitted with a high-pressure nozzle.
After rinsing, dry the floor with a rag and let it air dry before proceeding to the next step.
Step 2. Repair any cracks and dent on the floor
Once the floor is dry, inspect it thoroughly for any cracks and chipped areas. If you see any such imperfections, fill them or patch them up with a suitable filler. You can use a synthetic mortar compound for this purpose.
Deeper or wider gaps on the concrete may require a concrete patch using a trowel. So, the methods used in this step will depend on the extent of damage and your preferred materials.
Step 3. Etch the garage floor to roughen it up
Etching your concrete is an essential way to roughen it up to make the primer and paint stick better.
The process involves washing the floor with an etching product, a liquid etch solution that opens the pores on the concrete. This step helps create a textured surface that your primer and paint can better penetrate and adhere to.
Ultimately, this step ensures that your paint job lasts longer and resists peeling and chipping better.
Not all concrete floors will require etching, so you need to test your floor to determine if etching is necessary. To do this test, drop some water on the surface and observe how it behaves.
If the floor absorbs the water, you can skip etching because the floor is already porous. However, if the water beads on the floor surface, you must etch it to make it porous.
Any garage floor paint requires a slightly rough surface texture to adhere better. If the floor absorbs the water, you must let it dry properly before priming it.
However, if you must use an etcher, ensure you strictly follow the manufacturer’s instructions when using the product for the best results. After washing the concrete with an etching product, rinse it thoroughly with clean water and dry it before you proceed.
Alternatively, you can use a sander or power grinder to roughen up the floor. This process may take longer, but it will deliver the same desired results.
Remember to vacuum and damp-mop the surface after grinding or sanding it to remove the dust or ground concrete before painting it.
Step 4. Apply primer
Priming is essential as it helps ensure better paint adhesion to your garage floor. For professional-looking results, ensure you apply painter’s tape to the edges of the walls and the floor to protect them while creating clean edges.
Next, gently stir the primer with a paint stirrer to mix its contents well before use. After that, use a paintbrush to apply the primer to the floor, starting from the ends where it meets the walls, and work your way towards an exit, preferably the garage door.
Consider covering the edges on all four sides with your paintbrush and then switch to a paint roller to use on the rest of the floor.
To use the roller, transfer some of the primer to an open tray where you can easily dip the roller into it.
Roll the applicator in the primer-filled tray to load it with the product and start rolling it on the floor. Ensure you use a long-handled roller so that you can work on your feet without bending or kneeling.
Keep applying the primer in long strokes and reload the roller as soon as it runs out. Ensure you overlap the previous length each time you begin rolling again to prevent any gaps from remaining between the edges.
Keep following this approach heading toward the exit until you have covered the entire floor.
When you finish priming the floor, allow it to dry for the length of time the manufacturer recommends on the product label.
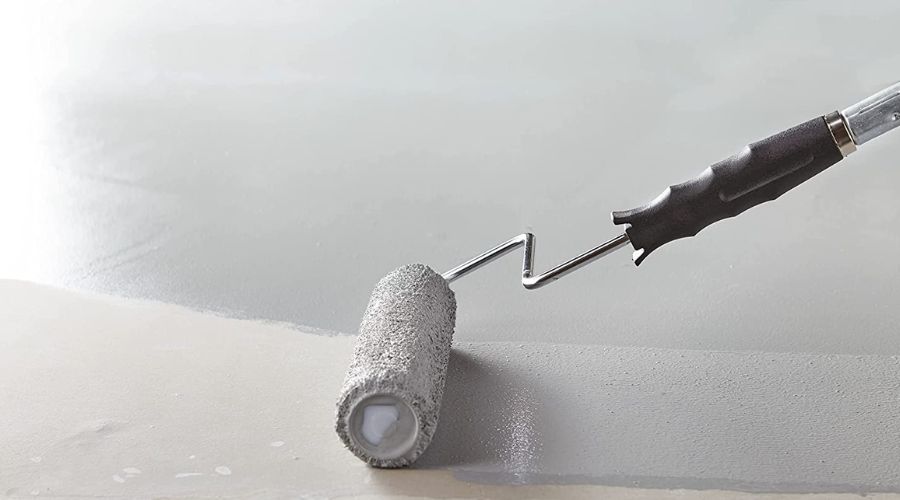
Step 5. Paint it up
After the primer has dried, follow the instructions on the label to paint the floor. Ideally, the approach should be the same as the one used to prime the floor—starting by the edges using a paintbrush and following through with a long-handle roller.
The approach would be different if you used a standard epoxy. However, acrylic, latex, and one-part epoxy paints will go with the same application methods.
As long as you have selected the ideal temperature and humidity conditions for the project, you should be good to go.
Remember to stir the paint to mix its contents well before applying it to the garage floor. Stirring helps redistribute the solids likely to settle at the bottom of the can. When you stir it, the contents spread out and create perfectly consistent liquid, making your paint job a uniform color.
Step 6. Recoat if necessary
Some products require only a single coat for the desired coverage, while others require at least two coats.
If your product requires recoating, wait for the first coat to dry completely, as the label recommends, before applying the subsequent coat.
You will need to follow the same approach as the first coat when recoating. For most products, you will need to wait about 24 hours for the first coat to dry before adding the second. Reading the label is the best way to ensure you are giving your floor the correct amount of dry time.
After recoating, let the floor dry completely before doing anything on it. The second coat may generally take longer to dry than the first, so be patient.
Step 7. Decorate the floor with color flakes (optional)
If you prefer to spruce up your floor with decorative flakes, you will have to toss handfuls of them onto the painted surface, one section at a time.
You will need to empty the decorative vinyl chips into an open container or bucket and keep it with you as you paint. After covering a sizeable section, scoop the flakes and sprinkle them onto the painted area.
Continue painting and applying the chips one section at a time until you have covered the entire floor. Applying the chips should be straightforward: simply throw them in the air over the floor you want to decorate, and they will settle into the wet paint coat.
Consider practicing the tossing exercise to ensure you get the hang of it before applying it to your project.
Once you are done decorating the entire floor, apply a clear sealer to the whole floor to protect the flakes and prevent them from coming loose.
The video below provides an illustration on how to paint your garage floor. Ensure you have chosen the best paint for garage floor to restore your garage door’s elegance.
Frequently Asked Questions-FAQs
Q1. Does painting the garage floor last?
Yes, a good garage paint job using acrylic latex paints typically lasts one to two years, while epoxy paint can last twice as long as these options without epoxy in their formula. Acrylic and latex paint for garage floors is less durable than one-part epoxy paints, so you may choose the latter for better durability and less frequent reapplication.
Q2. Is painting a concrete floor a good idea?
Painting a concrete floor can be a perfect way to change the floor color and enhance the garage’s aesthetics. However, if longevity is your objective, you may consider coating the floor with standard two-part epoxy instead.
Q3. Can you paint straight onto the concrete floor?
Yes, some paint brands or one-part epoxy paints allow you to paint directly onto concrete without priming the surface first. Often, these products already have a primer added or they are simply formulated with epoxy that adheres to concrete without requiring the help of a primer.
Nonetheless, you must follow the appropriate surface preparation techniques to get the concrete ready for painting. This may include thorough cleaning and etching of the concrete surface.
Final thoughts on painting a garage floor
Painting a garage floor can be an inexpensive way to transform the floor and the entire garage, making it more inviting and livable.
If you decide to paint your garage floor, start by choosing the right paint product and assemble the tools and materials you will need to complete the task. Next, choose a day when the temperature and humidity conditions are favorable for the paint chosen.
After that, follow the instructions in this guide to paint and transform your garage. We hope this write-up helps you create the desired look in your garage.