If you own a garage door opener, you probably know the keypad on the outside of the garage door is one of the essential features. It offers a secure way for you and any authorized person with the access code to enter your garage.
The keypad can be a convenient way for your family or a delivery person to access your garage without requiring a key or your presence. It also comes in handy when you do not have a remote control with you.
Read along to learn how to reset garage door keypad without enter button for any reason
Also Read:
- Best Garage door Keypad
- Best Garage Door Openers
- Best Z-wave garage door openers
- Best wall mount garage door opener
Can You Reset a Garage Door Keypad Without the Enter Button?
Yes, it is possible to reprogram a garage door keypad without using the enter button, or more specifically, when the enter button is missing. All you need is to follow a quick and straightforward process correctly, starting with entering the gadget’s operating mode.
Most of the keypads from different brands are pretty similar in design, so you should have no trouble applying the knowledge you acquire here across various keypad models and brands.
As the name suggests, a garage door opener keypad is a device that allows you to enter a personal code to open or close your garage door. It sits right outside the garage door, either on the right or left panel of the entrance.
The keypad connects to the garage door opener setup mounted inside the garage. It typically has numeric keys from 0 to 9 and additional buttons with unique functions or features.
Once you enter the correct passcode on the keypad, it triggers the opener to open your garage door.
However, you can forget the numeric passcode, or the entry code can stop working for some reason. If any of these events happen, you will have to do a quick reset to erase the previous password and create a new one for accessing your garage.
How to Reset Garage Door Keypad Without Enter Button
Resetting your garage door keypad without the enter button is fast and straightforward. If you have a LiftMaster garage door opener, the process requires switching from an operating mode to program mode first, followed by your preferred new 4-digit pin.
Once you enter the number, you can switch the system back to ‘operate’ mode before putting it back to work.
Anyways, here is a step-by-step procedure for completing the reset task.
Step 1: Locate the internal switches within the garage door opener remote control by removing its cover.
Step 2: Simultaneously press the * and # pound buttons to reset the password. Observe the red light blinks a couple of times until it stops to indicate reset.
Step 3: Enter the new 4-digit passcode followed by the # pound button.
Step 4: Press your garage door opener type (1-9). If unsure, check the backside of your device to determine your opener type’s number. Once you have entered the opener type number, press the # pound button.
Step 5: Locate the “LEARN” button on your garage door opener, always near the opener’s antennae. Suppose you have a ceiling mount or wall mount opener, set up a ladder to reach the button. You must slide the mortar casing to access the button. Press the LEARN button and observe the opener blinks.
Step 6: Within 30 seconds of releasing the LEARN button, rush to the keypad outside your garage door, press the new passcode, and then press 0 three times. This should be done before the opener flashing stops. The flashing shows that the opener is ready to be reset and accepts the new code from the Keypad unit. Remember, you can have someone help if you cannot reach the keypad in time.
Step 7: Test the new passcode. Enter the new password on the keypad and observe whether it is closing or opening your garage door.
Alternatively: Method 2
Step 1: Disconnect the garage door opener from its power source
Attempting to maneuver the inner opening of your garage door opener while it is connected to a power source could expose you to the risk of electric shock. To avoid that risk, start by unplugging the opener.
This step will power off the device and keep you safe from accidental electric shocks.
Step 2: Switch to Program mode from the Operate mode
Start by removing the faceplate from the garage door opener. This should allow you to access the device’s dual program-operate switch.
The switch may differ from one model to another, but it will be labeled with ‘operate’ and ‘program.’
Once you locate the switch, you should notice that it is set to the ‘operate’ mode by default. Change it to ‘program’ to ready it for the passcode reset.
Switching the mode from operating to programing allows you to change the personal identification number for your garage door opener.
Step 3: Enter the new passcode
Once in the programming mode, it is time to change the garage door opener passcode. Go ahead and input your new four-digit PIN. This is the code you and anyone accessing the garage will key in each time they want entry, so ensure you memorize it.
Ensure you do not use an easy-to-crack generic PIN that unauthorized persons might easily get hold of. So, we recommend writing down the new PIN in a safe place where only you can access it and no one else. This record can come in handy if you forget the pin.
After entering the pin, switch the device back to its default ‘operate’ mode. Next, plug it into the power source to complete the PIN reset process.
Ensure you test the new PIN by using it to open the door before packing up.
Resetting other keypad models
A few other models across the leading brands also allow you to reset the keypad without the enter button. This section will look at two of them.
How to reset Chamberlain clicker garage door keypad without the enter button
- Remove the cover from the keypad to expose the numerals.
- Press and hold down the star (*) and pound (#) buttons at the same time
- Key in a new four-digit password, followed by the pound (#) button, then your garage door type code
- Press the # button again to register the new password
- Head over to your garage door opener and press the Learn button
- Go back to the keypad outside your garage door and enter the new PIN again
- Press zero (0) three times and your garage door keypad is reset
Chamberlain is a popular garage door opener brand that you might have at home. In this case, notice that the key to resetting the keypad is knowing your garage door type code.
This code corresponding to your garage door type can be any number between 1 and 9. You should find the type code if you still have your manual. If you do not have your garage door opener manual, try checking the backside of your opener for it.
If you do not locate the number through either method, your remaining option is to experiment with it until you eventually hit the correct number. As mentioned, the codes range from 1 through 9, so if you start at 1 to experiment, you might have to do that nine times.
The chances are that you will find the right type code before you reach 9.
Anyways, here is the procedure to follow when resetting the Chamberlain keypad without the enter button.
Step 1: Remove the cover from the keypad to expose the numerals.
Step 2: Press and hold down the star (*) and pound (#) buttons simultaneously and observe a red-light blink. Hold them down until the blinking stops, indicating the password on the keypad memory has been deleted or reset to the factory.
Step 3: Key in your new four-digit password, followed by the pound (#) button, then your garage door type code (the code can be any number from 1 to 9).
Note: If you do not know the garage door type code and have to experiment a few times until you find it, you may have to try 1, then 2, then 3…, that way until you eventually hit the correct type code (which can be any number from 1 to 9).
Step 4: After pressing the garage door type code, press the # button again to register the new password. After this sequence of numbers, the lights should go off, indicating that the new code has been programmed.
Step 5: Now, head to your garage door opener. Set up a ladder to reach the opener if it is wall or ceiling mounted. Locate the Lean button on the opener, normally on the side of the antennae, and orange or yellow, depending on your model, with an LED on its side. Press and release the Lean button and observe the LED blinks.
The blinking indicates that the opener is ready to accept a new code.
Step 6: Go back to the keypad outside your garage door and enter the new PIN again. Usually, you will have 30 seconds between pressing and releasing the learn button and entering the code, so be quick at it.
Step 7: After entering the new four-digit password, press zero (0) three times to end the programming process.
Step 8: With that sequence of events, your garage door keypad is reset, and you can test it to see if it is working.
If you miss anything, repeat the procedure to get it right.
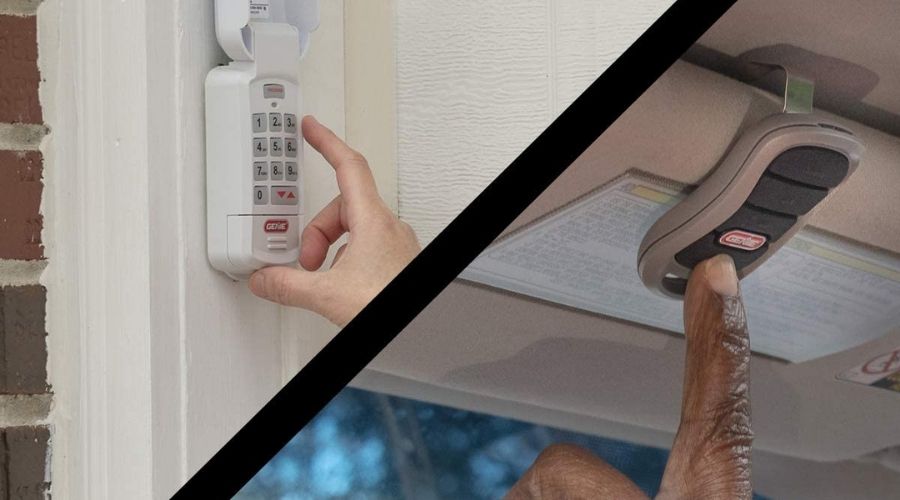
How to reset Genie garage door keypad without the enter button
Like the first two clicker keyless entry systems above, resetting the Genie garage door keypad without the enter button is straightforward. You just need to follow the steps correctly.
Let’s dive right in.
Step 1: Start by sliding the lid of the keypad up until it latches to expose the numerals. Then, hold down the pound (#) and eight (8) buttons simultaneously until the backlight stops blinking.
Step 2: Push the buttons; 3, 5, 7, # in that order.
Step 3: Next, key in your new PIN followed by #.
Step 4: Key in the door code (available in your user manual), as indicated.
Step 5: Done. Slide the lid back down to its original position.
Step 6: Test the new PIN by sliding the lid back up to expose the numerals, entering the PIN, then pressing the * button. The door should unlock to indicate it is working.
Why you might want to reset your garage door keypad
Resetting your garage door keypad can be influenced by several elements, including loss of the PIN code or the PIN falling onto unauthorized persons, moving into new homes and wanting to change the old PIN or trouble remembering your opener code.
A compromised keypad code
For starters, your garage door might need a new password if you suspect an unauthorized person has the passcode to your keyless entry pad.
The main role of a garage door opener with a personal entry code is to safeguard the garage from unauthorized entry. If you suspect a breach has occurred to that security, you can no longer be confident about controlling who can enter your garage.
The surest solution is to change that entry code to lock out any unauthorized person that might have the previous code.
Getting new tenants if you have renters
You need to change the access passcode to guarantee the security of your garage if you have new tenants coming in with the previous ones leaving. This is a case of having someone (previous tenants) who knows the password; you want to change it to something they do not know.
Forgetting or trouble remembering your garage door opener code
While the password needs to be unique for security reasons, it should be something you have off the top of your head. If you forget it, you’ll need to set up another. The same thing should apply if you keep forgetting your current PIN.
Malfunctioning Keypad Code
Sometimes, your keypad code might malfunction and influence the smooth operation of your garage door. Your garage door keypad code might malfunction when you change the batteries. Also, you may interfere with the code when you put in an incorrect PIN, which may result in the keypad getting blocked after several attempts.
The primary solution to blocked PIN or malfunctioning code is reprogramming the keypad. The process is pretty simple. You must first locate the Lean button on your garage door opener, always orange in color and on the side of the antennae.
You need to press the button and release it when the LED on its left starts blinking. Input your new 4-digit code within 30 seconds of releasing the Lean button. You can have a family member help you if you cannot make it to the keypad unit within the period.
How to Reset Clicker Garage Door Keypad
A clicker garage door keypad brings convenience to your life in numerous ways. For instance, you don’t have to wait for someone to come and open the garage door. You only need to insert the passcode in the keypad, and you are in.
But sometimes, you may forget your passcode, which can be a great inconvenience forcing you to access your garage manually. Things can get a little worse if you don’t know how to reset your clicker garage door keypad. Follow the below process to reset your clicker garage door keypad.
Step 1: Slide the clicker keypad cover-up to access the numerical.
Step 2: Press and hold the * and # buttons simultaneously and observe the keypad blinks for a couple of seconds. Wait until the flashing stops, indicating that the keypad is reset.
Step 3: Enter your new unique password, followed by the pound button (#).
Step 4: Enter the type of garage door opener. Often, type 1 to 9. If you do not know the exact number, you can try out the numbers until you determine your opener type and follow it by pressing the pound button (#).
Step 5: Set up a ladder to access your garage door opener if it is slightly off the ground to guarantee easy reach.
Step 6: Locate the Lean button on your opener on the side of the antennae. For most openers, the button is orange in color. Press and release the button when an LED light blinks on its side.
Step 7: Within 30 seconds of releasing the Lean button, key in the new passcode on your clicker keypad before the blinking stops. Press 0 three times to end the programming process. Your garage door should operate normally with the new passcode.
Step 8: Wait for about 20 seconds and try the passcode. Ensure that the passcode you have set is unique, and do not share it with intruders.
If you intend to create a new passcode in the future, follow the same process. The primary challenge is always identifying your garage door opener type. However, once you have tried the numbers between 1 and 9 and mastered your garage type, the programming in the future will be pretty straightforward.
The below video describes how to reset Clicker Garage Keypad. Watch and demonstrate on your garage door system supported by the text.
How to Reset Chamberlain Keypad Code without Resetting Keypad
You can reset your Chamberlain Keypad code without clearing the old passcode or resetting your keypad. The new code will overwrite the old one, and your door will function normally with the new code.
Here is the trick.
Step 1: Set up a ladder and reach your Learn button on the garage door opener. Press and release it when the LED light starts flashing.
Step 2: As the opener LED light blinks, rush to your keypad and enter your new password within 30 seconds of releasing the Learn button.
Step 3: Press the 0 buttons 2-3 times and observe the opener lights stop blinking, and your garage door will come down. Re-enter your passcode and observe your garage door opening.
This shows that your garage door opener has been programmed with a new passcode without clearing the old code in your keypad or resetting the keypad.
Old Liftmaster Keypad Programming
A Liftmaster keypad keeps your garage safe from foreigners. But how do you program the old Liftmaster keypad? The process is relatively easy, especially if you sift through this straightforward guide.
Step 1: Unplug Your Garage Door Opener
The first thing is to unplug the garage door opener to avoid getting shocked mistakenly.
Step 2: Switch from Operate to Program Mode
First, remove the faceplate from the garage door opener and look for a program or dual operation. Once you spot it, you will notice that it’s running on the operating mode. So you will want to shift from operating to program mode so you can change the pin easily.
Step 3: Changing the Pin
Once you switch to program mode, you can now change the garage door keypad pin. After setting up your new pin, switch back to operation mode and engage your garage door opener.
Tip
It’s wise not to set a generic pin that is easy to guess. Setting an easy pin such as 0000 or 1234 can compromise security. So choose a difficult pin and write it down on paper, so you don’t forget it. Also, if you set the pin and the LED light fails to blink, the keypad is not putting up with the reprogramming instructions. If that happens, confirm if the battery has sufficient charge.
The reason you program your old Liftmaster garage keypad is to prevent new tenants from accessing your garage and maybe walk away with your valuable essentials.
LiftMaster Garage Door Keypad Not Working
The LiftMaster garage door keypad might not work due to dead batteries, a reset pin call that results when you forget your password and make several unsuccessful attempts, and sticking keys due to dirt or dust accumulation over time.
When operating the best keypad door garage opener models, you can be irritated and inconvenienced when the keypad fails to respond and lock you out of the garage. You would want to call a professional for a fix, a practice that could also be costly from your end.
However, in most cases, you would realize that the problems do not warrant the cost as they are things you can fix.
Below are some of the causes of Liftmaster garage door keypads failing to function and the troubleshooting ideas you can execute before calling a professional to fix the keypad.
Dead Batteries
Keypad garage door openers use batteries as the primary source of power. At some point, the batteries may need replacement as they have a lifespan of between 12 and 18 months. Most units have LED indicators that will show you when the batteries are due for recharging. However, you may not realize it in some units until the keypad becomes dysfunctional.
Fixing the issue will only require a battery replacement. Follow the below simple step to replace your keypad batteries;
- Slide the keypad cover down and locate the battery compartment.
- Slide the cover of the battery compartment to access the batteries. Remove the old batteries.
- Insert the new 9V alkaline batteries while taking note of the positive and negative terminals of the battery.
- Replace the cover with the battery compartment and re-install the keypad.
- Test the functionality of the keypad. Check whether the buttons light up.
Reset Pin
A reset pin is another essential consideration for a non-functional garage door keypad. Sometimes, you may forget your pin and make several attempts, or another individual comes to guess the pin with no success.
Most garage door keypad systems lock up and would not work when the wrong code has been entered numerous times until you set a new pin. Thus, if you try your pin and realize the keypad system does not work, try setting a new pin. The process is pretty straightforward;
- Locate the position of the lean button (The large square buttons located under the light lens on the back panel of your Liftmaster garage door opener).
- Press and release the buttons when the LED light beside it flashes.
- On your keypad, key in a 4-digit pin within 30 seconds of releasing the Lean button.
- Press 0 when the flashing on the opener stops to end reprogramming and test the keypad with the new PIN.
Sticking Keys
The garage door keypad stays outside daily and may attract dirt and grime over time. The dirt and the grime may cause the sticking of the keys and compromise their functionality. Remedying this problem is simple. You only need to clean the keypad carefully.
- Take a clean, soft cloth.
- Apply a few drops of an appliance cleaner to the soft cloth and clean the keypad while focusing on the spaces between the keypad.
- Remove the front box of the keypad and wipe clean all the dust using a clean, dry cloth
Reboot the System
Once you have attempted the above solutions, including changing the batteries in vain, it is prudent that you reboot your garage door keypad system. A keypad garage door system operates like other computerized systems. Like the other systems requiring restating, you can also troubleshoot the keypad garage door system by turning it on and off.
Rebooting the system is crucial as it helps clear the memory, which can fix numerous undetermined issues. You can unplug the system for between 3 to 5 minutes and then plug it back. You then test its functionality
How to Program the Chamberlain Remote
Method 1-Using LEARN Button
- Locate the LEARN button on your Chamberlain garage door opener.
- Press the LEARN button and immediately release it. The pressing of the buttons will cause a steady LED glow.
- On your remote control, press the HOME button or LEARN, 30 seconds after releasing the learn button on the garage door opener.
- Note the flashing of the garage door, or in some instances, you will hear two clicks. The two cases show the remote has been successfully programmed.
Method 2- Using the Door Control Button
- On your garage door control, locate the LEARN button. It is always yellow, purple, or green, depending on your garage door model and on the antenna’s side.
- Press the button twice and note whether the LED blinks. This shows that the door control is ready for programming.
- On the remote control that you intend to operate the garage door, press and release the button (HOME button).
- Observe the flashing on the door opener lights, or you may hear two clicks on the door control. Either of the two confirm that the remote has been successfully programmed.
Method 3- Using Smart Control Panel
- Below the MENU button, locate the navigation button.
- Scroll to the PROGRAM using the navigation button.
- From the Program menu, select the REMOTE you intend to program.
- Press a button on the remote control you are programming.
- Observe your garage door opener flashing, or you will hear two clicks when the opener accepts the new instructions or is successfully programmed with the remote.
Why Does a Garage Door Keypad Not Work in Cold Weather?
Your garage door keypad may fail to work in cold weather due to low battery voltage, exposure to freezing temperatures, or bad wire connections.
A fall in temperature can result in your battery-operated keypads shutting down. Batteries deplete more quickly than usual in cold conditions, which may be the cause of the keypad malfunction. Notably, the cold weather affects the chemical reactions needed for the functioning of the batteries.
The door opener’s keypad batteries discharge faster when exposed to cold conditions. Besides, the cold temperatures affect the chemical reaction needed for the batteries to function effectively. The location of the keypad outside the garage door supports this exposure to unfavourable temperatures. As a result, when there are low temperatures, the batteries will run down faster, causing the garage door keypad to malfunction, contrary to the batteries’ lifespan.
Secondly, extreme cold can break the keypad because the internal parts may constrict or freeze. When this occurs, the keypad might not correctly register the input or the buttons might stiffen and become challenging to press, also resulting in the malfunction of your garage keypad.
Finally, a garage door keypad may stop functioning in cold temperatures due to poor wire connections. The wiring may shrink or become brittle when exposed to cold, resulting in disconnected or loose connections. This can make it impossible for the keypad to receive electricity or send the proper signals to the garage door opener.
It’s crucial to check that the keypad has brand-new batteries inserted and is shielded from frigid temperatures to solve these problems. The keypad can also be kept from malfunctioning in cold weather by routinely inspecting the wire connections for signs of wear or damage and fixing any issues.
How to Factory Reset Chamberlain Keypad
Resetting your Chamberlain keypad may take different approaches depending on the model you are using. However, for most chamberlain keypad openers, follow the below process.
- Find the “LEARN” button on the motor of your garage door opener. The button is always on the side of the antenna wire and has an LED beside it.
- Press and hold the LEARN button until the LED on its side goes off. This indicates that the previous keypad code has been erased from the opener’s memory.
- Within 30 seconds of releasing the LEARN button, enter a new four-digit PIN on your keypad, followed by the “Enter” button. The “Enter” keypad button must be pressed and held down until the garage door opener motor unit’s light bulb flashes once.
- Release the “Enter” button, then use the newly-programmed four-digit PIN to test the keypad. Ideally, the garage door will open or shut.
If the procedures above don’t work, refer to the user guide or contact Chamberlain customer service for detailed advice on factory resetting your keypad’s specific model.
Frequently Asked Questions-FAQs
Q1. How Long Do Garage Door Keypads Last?
Garage door keypads make our life easy in many ways. Instead of walking around with a clunky remote or keys, all you require is a unique code. This convenience makes it worthy of having a working keypad.
But how long do they last? A garage door keypad won’t last forever. I say this because this gadget is installed outside. For this reason, it suffers from humid weather and other sources of wear and tear. These deteriorating elements combined with age can bring about malfunctioning.
Q2. Why is My Garage Door Keypad not Working?
When your garage door keypad is not functioning as expected, chances are it has broken or stuck keys, the batteries are not sufficiently charged, and frayed wires. Also, extreme weather conditions and other aspects such as liquid spills, humidity, and basic wear and tear can make your garage door keypad malfunction.
So if you suspect the above aspects might be the issue, take your time to examine the keypad, look for stuck or broken keys, cracks, and other potential damages. If you spot any mishaps, fix the issue yourself or call a technician to fix the imperfections.
If you mend the keypad imperfections and it still fails to work, that suggests that your keypad is outmoded. As an alternative, you will want to replace the keypad or the entire system.
Q3. How Do You Change Batteries in a Garage Door Keypad?
It isn’t very pleasant to discover that your garage door isn’t working as expected. However, the solution is straightforward: change the garage door keypad batteries assuming that’s the cause of the problem.
Electronic gadgets run out of batteries, which holds true for garage door keypads, depending on how frequently you use them. Ideally, garage door keypad batteries can serve you for over a year without the urge to replace them. But how do you change the batteries if they run out? Find out below:
First, raise your keypad’s cover and assess the underside. You should see a slot for batteries. If you can’t locate the slot, look for the direction in the user manual.
Next, remove the keypad cover so you can access the batteries. Then take out the existing batteries and ensure you throw them away safely. After that, insert new 9 volt batteries in the battery slot and return the cover. Test and see if the keypad is up and running as usual.
Sometimes the keypad fails to work after replacing the batteries. In such cases, you will want to clean your keypad keys because it is likely the keys have accumulated dust. Cleaning the keys is quite easy: take a soft cloth, apply an appliance cleaner, and wipe your keypad keys. After that, pass a dry cloth over the keypad and test if it’s working.
You may also want to re-enter your passcode because you might have inserted the wrong password. If the security system shuts down, reset the passcode and re-enter.
Q4. Why is My Garage Door Keypad Flashing?
The flashlights often indicate that your garage door safety sensors are misaligned. Also, if the safety sensors cables have issues, the LED flashlights will blink ten times. So you should call an expert to repair your door if any of these signs show up.
Q5. How do I reset my garage door keypad without the old code?
If you want to reset your garage door keypad and have forgotten the old code, you need not panic. The process of how to change garage door code without old code is pretty simple.
First, you need to locate the switches within the opener. Remove the cover from your garage door opener remote control. Then, locate and press the * and # pound buttons simultaneously until the door. Notice the red light blinking. Continue pressing the two buttons until the blinking stops. This shows that the code has been reset.
Conclusion
A garage door keypad can be helpful in providing access to your garage door when most needed. Various reasons can make it necessary to reprogram the keypad to keep it useful and secure. For this reason, knowing how to reset a garage door keypad can go a long way in helping you complete the task without incurring the cost of hiring a technician.
We hope you find this tutorial helpful. Please leave any thoughts or comments in the comments section below.